There is a saying that happiness is like having a piece of cake on your plate. Actually every dessert is a reason to have a satisfactory smile. Whether you want to make sponge cake, souffles, or meringue-topped pies, whipped egg whites are one common thing that is needed.
So, if you want to quench your cravings for these desserts, you need to learn how to whip egg whites. Many people think that whipping egg whites is really easy, and once they try, only failure comes as the outcome. It’s because many terms related to this task are being ignored, or they simply don’t know about them.
And to help you out, I have arranged every piece of information in my writing, like how long to whip egg whites with different kitchen gadgets, what ingredients you need, how to make the whipped egg whites stable, how to incorporate them in recipes, and so on.
Hence, take this sweet journey with us, and you will be able to successfully whip your egg whites and learn some mouth-watering recipes. Let’s start with the basics.
What Happens When You Whip Egg Whites?
When you beat egg whites, it forces air into them. The majority of egg white is made up of water and protein, so when you beat it, the protein stretches and causes bubbles to form around the water. And after the continuous beating, the consistency of the egg whites changes.
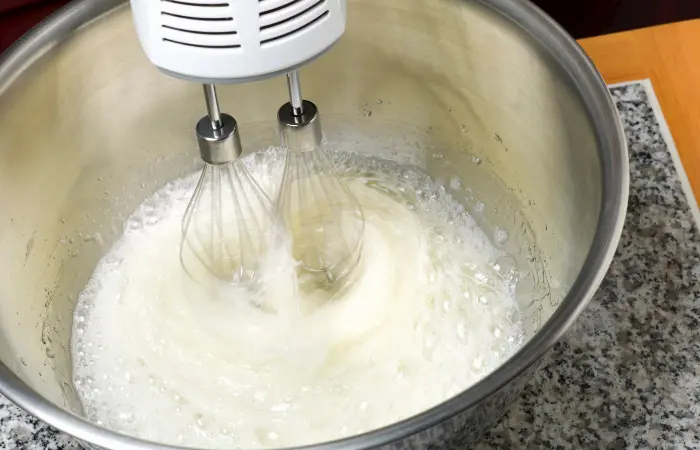
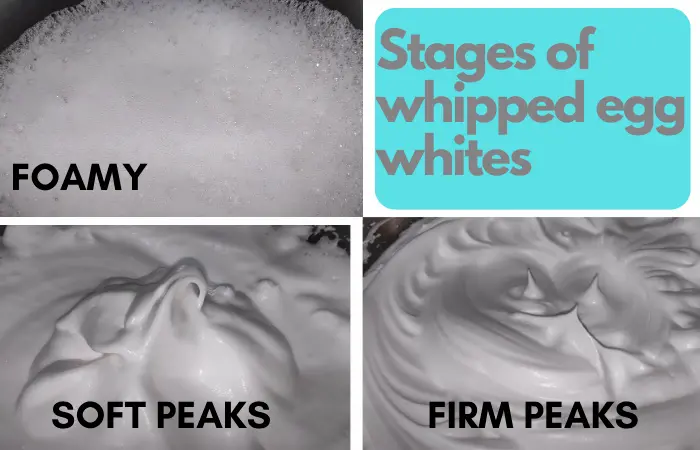
There are three stages of whipped egg whites: foamy, soft, and stiff peaks. However, if you overbeat them, you will have to make it again, as it can’t be used. So, here is a brief summary of each stage.
Foamy
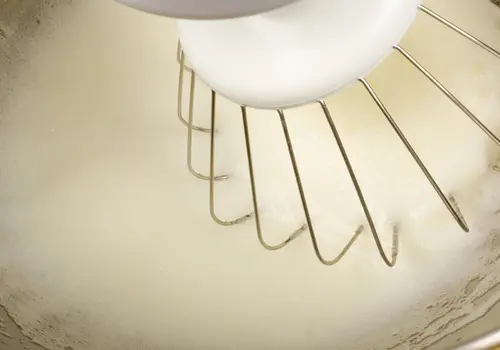
After beating for a few minutes, you will notice a foamy texture of the egg whites. It will still be liquid with bubbles and look slightly opaque.
Soft Peaks
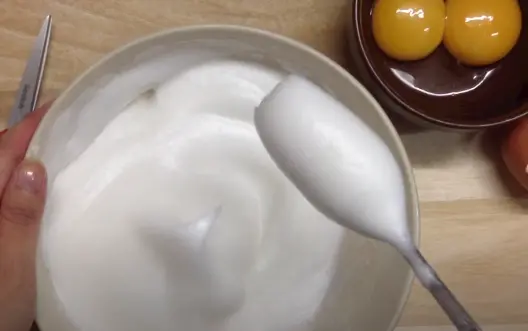
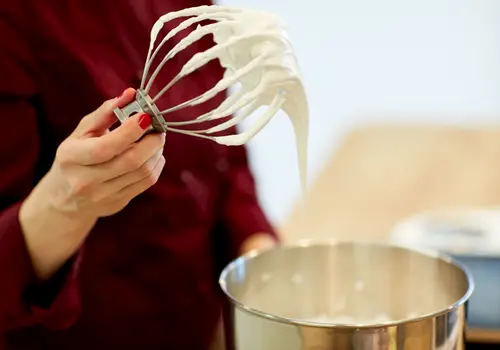
You will notice the egg whites have now turned white and are holding shape in the bowl. If you turn the bowl on its side, it will not spill out. And when the whisk or beater is lifted, the egg whites will form soft peaks that collapse to the side.
Firm Peaks
In this stage, the peak of the egg whites will stand upright and not droop when the beaters or whisk are removed from the mixture. When you see firm peaks, it means the egg whites have now reached their maximum volume.
This means you should stop after beating egg white to stiff peaks.
Over-Beaten
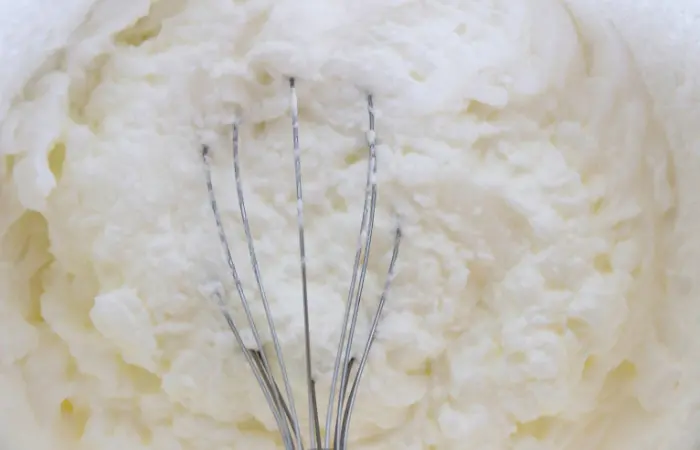
Now, if you keep beating the egg whites after reaching firm peaks, the matrix of protein will break down, and the foam will collapse. As a result, the liquid will begin to separate liquid, becoming grainy, watery, and flat.
At this point, you won’t be able to regain the needed texture anymore.
So, you can see that timing is crucial in achieving the perfect whipped egg whites. Now, the obvious question is, how long does it take to whip egg whites?
Well, my next segment has your answer.
How Long to Whip Egg Whites? Estimated Time with Different Tools
In the kitchen, you will find different types of tools that are suitable for beating egg whites. So, depending on which one you choose, the amount of time needed to beat egg whites to whip will vary.
Also, the time will vary on how many egg whites you are beating, the temperature of the eggs and room, as well as the speed of your mixer.
Usually, if you use a high-speed mixer, you can achieve the stiff peak in 4 to 5 minutes. But, as I said, many terms will affect the total time.
Therefore, I will tell you the estimated time for different equipment now.
Electric Hand Mixer
If you use an electric hand-held mixer, you should start beating at a low speed and gradually increase the speed. After around 4 to 5 minutes, you will achieve a soft peak. Beating for another 2 minutes will give the desired stiff peaks.
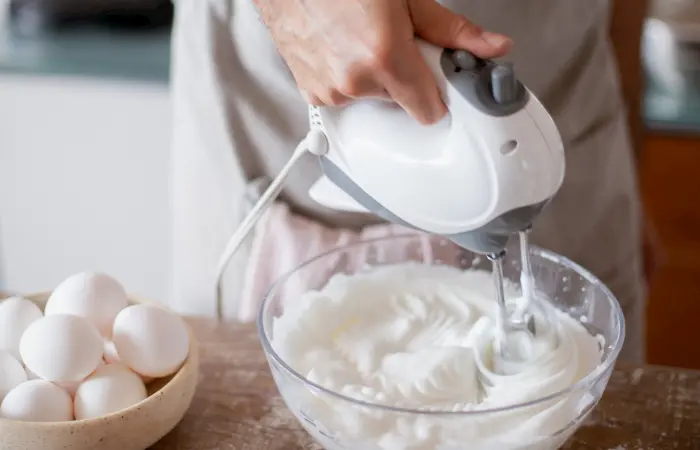
So, you will need about 6 to 7 minutes in total. This time is estimated for room temperature eggs, so if you take cold eggs, it will take more time to whop. Also the number of eggs is another factor.
That’s why, when you whip egg whites, you need proper knowledge of what the soft and stiff peaks look like. Then, when you notice stiff peaks, you can stop immediately.
Stand Mixer
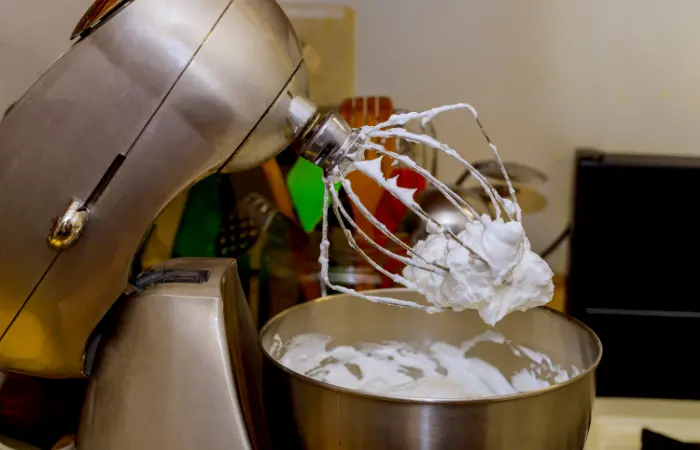
With a decent stand mixer, it will take about 4 to 5 minutes in total to make whipped egg whites. However, the stand mixer’s speed may vary according to brand. So, make sure to stop your mixer in between to see which stage the egg whites are at that time.
First, you can stop when you see bubbles, then run your mixer for a minute. At this time, you may reach the soft peak. Then, run it for another 1 or 2 minutes until it reaches stiff peaks. Remember that checking it is necessary as you may end up overbeating them.
With A Balloon Hand Whisk
Beating egg whites by hand is both a time and energy-consuming task. Still, many people love to use a hand whisk to whip egg whites. Also, this is an easy option when you don’t own an electric mixer.
Now, the time for this tool depends on how fast you can beat it with your hand.
It took me nearly 10 to 12 minutes to get the perfect firm consistency. But, of course, I had little breaks in between.
Tip: While using a balloon whisk, try not to move your arm but only your wrist to whisk. That way, you will be able to whisk for a longer time. It will still be tiresome but a lot more manageable if you use this trick.
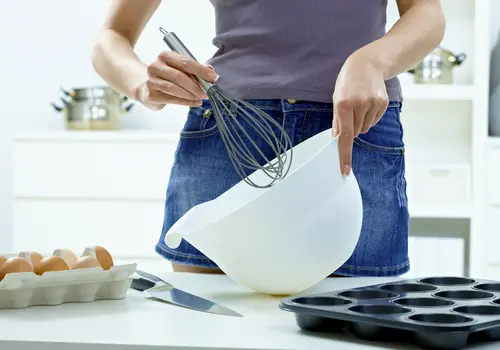
Anyway, if you want to avoid using the hand as well as don’t have a mixer, there is a tool that can help you out. Just take a look at my next kitchen gadget.
Blender
Can you whip egg whites in a blender? Well, 100% yes!
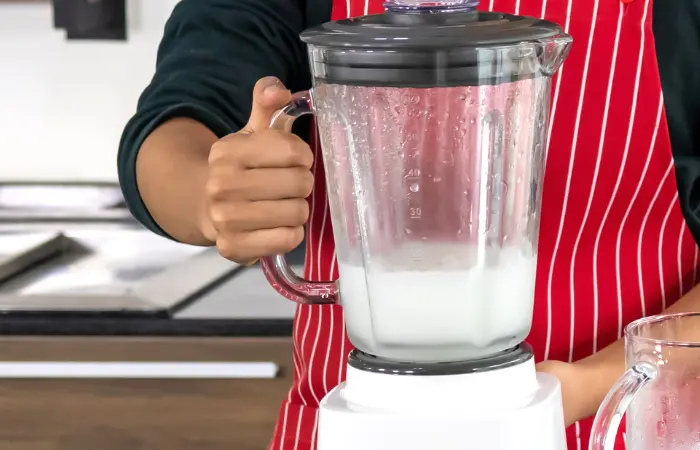
If you don’t have an electric mixer or want to use a balloon whisk, you can simply do it using your blender. Your chances of attaining (near) perfectly beaten egg whites increase with the number of speed settings your blender has.
Using the lowest speed setting is essential for beating egg whites in a blender because high speeds will destroy them by sucking all the air out of them. So, blend egg whites at the lowest speed possible.
Typically, the egg whites will take about 10 minutes to reach firm peaks. However, since different blenders have varying speed settings, you should keep an eye on the peak stages as you blend.
Alright, here comes our last tool.
With A Fork
Can you whip egg white with a fork? Is it even possible?
Well, yes, it works. But using a fork to whip egg whites should be your last choice when you have no other option. It’s tiring and takes too much time.
After you begin beating the eggs continuously for 2 or 3 minutes, you should see an increase in volume. Keep whisking the eggs quickly and in a circular motion. You should reach the perfect consistency in 12 to 18 minutes. But, of course, your strength will play a major role in it.
Anyway, now that you have learned how long does it take egg white to whop, it’s time to discuss other crucial factors. For example, you may have tried to whip egg whites, but every time it ruins even when you didn’t overbeat. Then you wonder, why won’t my egg whites whip, what went wrong, how should I do it, and so on?
The fact is, you are doing something wrong without even knowing the reason. And that’s why you should learn how to whip egg whites properly. Just go through my next segment, and you will be able to whip your egg whites like a pro!
How to Whip Egg Whites? Step By Step Preparation, Instructions & Tips!
This guide will let you understand the nature of egg whites, the proper techniques, and what add-ins are necessary to hold the shape. Let’s start with the ingredients.
Step 1: Required Ingredients
- Egg whites
Recipes that require whipped egg whites usually call for a minimum of 2 eggs. However, the larger the recipe portion, the more egg whites you will need. Also, use eggs at room temperature because they will whip faster.
The ideal egg white temperature for whipping is about 21°C (70°F).
- A little pinch of salt
Make sure the salt is fine, as it requires to dissolve into the whites easily.
- An acid
You may use cream of tartar, lemon juice, or vinegar.
- Sugar
Sugar is only needed if you are making meringue or frosting. Otherwise, skip it.
Step 2: Tools Needed
- A large copper/ stainless steel/ glass bowl
The material of the bowl you will use to beat your egg whites plays a vital role. Don’t even think of using a plastic bowl for this task. Plastic holds oils like a sponge, leaving you with broken and weepy whites. Also, avoid using aluminum bowls since they will react with any acid added to the whites and cause them to turn gray.
A copper bowl is the best. Stainless steel or a glass bowl is also a great option if you don’t have it.
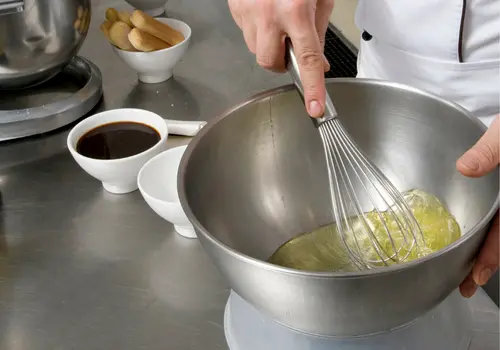
Additionally, whipping whites increases their volume overall by 6 to 9 times. Hence, make sure that your bowl is large enough.
- Hand-held mixer/ stand mixer/ whisk
Using either a hand-held electric mixer or a stand mixer is recommended for the best result. But, if you don’t have these, you may do it all by hand using a whisk.
Other options are a fork and blender, which I already discussed before.
- Vinegar/ lemon juice and a paper towel
Wipe your bowl with acid before using it. This will eliminate any fat that prevents the egg whites from fully whipping and helps form a stable foam. Lightly dab a paper towel with lemon juice or vinegar and wipe the bowl interior and the whisk.
Step 3: Separate the egg whites and whip them
Carefully separate the egg whites and be sure that no yolks get in the whites. If you see even a little bit of yolk in it, don’t use that egg white.
Egg whites are easy to separate from yolk when they are cold. So, here is what you can do. After you remove the eggs from the fridge, separate the egg whites immediately. Then, leave them until they reach room temperature, and then start with your beating process.
A bonus tip: Separate each egg white in a small bowl first and then pour it into the mixer bowl. In this way, if you fail to separate the yolk of one egg, you can put it aside for other use.
Now, put the egg whites in a stand mixer bowl with a whisk attachment (or a standard large bowl for those using manual mixers/whisks). Then, add a pinch of salt to it.
Start beating at a low speed until they start to become frothy. Since egg whites are delicate, you should start slowly and gradually increase the speed when they begin to froth and grow in amount.
Step 4: Foamy stage
After beating for about one minute, you will reach this stage. You will see tiny bubbles forming above.
Step 5: Add the acid
Right after you reach the frothy, add the cream tartar, lemon juice, or vinegar. Only use a little bit. Typically, most recipes require ¼ teaspoon of cream of tartar or a few drops of vinegar/lemon. I usually use a pinch of cream of tartar.
So, follow the amount for which acid you will use. Now, you may feel like there is no need to use it for your recipe. And that’s where you make a mistake.
Acids are key in producing well-whipped egg whites as they help stabilize and increase their volume. Hence, don’t skip it.
Anyway, after adding it, increase your mixer’s speed to medium and continue beating.
Step 6: Soft peak stage
After beating for a few minutes, the egg whites will reach their soft peak stage. They will look much whiter and softer than they did when they were still foamy. When you lift the whisk and hold it upright, the whites will form peaks that fall over to the side.
Note: If you make meringues or other sweet desserts that need beaten egg whites, then you need to add sugar at this point. One spoonful of sugar should be incorporated into the egg whites at a time to prevent losing the lovely air you have produced when beating.
So, after checking out the soft stage, increase the mixer’s speed from medium to high and keep on beating.
Step 7: Stiff peak stage
After a couple of minutes, the egg whites will reach the stiff peak stage. When you lift your whisk, the peaks formed at this time can stand alone and maintain their shape without melting over. Also, if you turn the bowl upside down, they shouldn’t slide out.
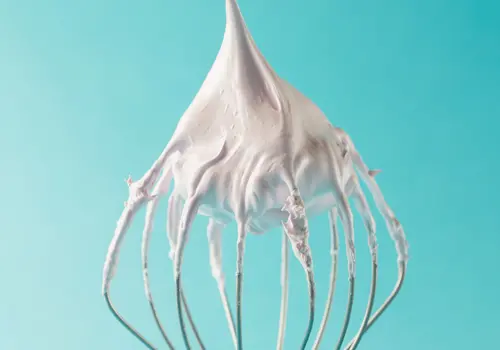
That’s it! You got your fluffy, white, thick, perfectly whipped egg whites. By the way, if you added the sugar in step 6, the outcome would be firmer and glossier than the regular beaten egg whites.
Try to use them immediately, or they will start losing shape, and you won’t be able to use them.
Storing tip
Whipped egg whites can be kept in the refrigerator for up to two days in an airtight glass container.
Alright, I have finished discussing how to whip egg whites. Now, I will talk about another important fact. Many people have a misconception that adding only sugar to whipped egg whites makes the perfect frosting to pair with various cakes.
But it’s not true. There are some extra ingredients as well as techniques that make it whipped cream. So, if you want to learn, check my next section.
How to Make Whipped Cream with Egg White And Sugar?
The usual whipped cream for frosting is made from heavy cream. But if you run out of heavy cream and need a backup for frosting, then egg whites can save you.
So, here are what ingredients you will need to make egg white whipped cream.
Ingredients
- 3 large egg whites (try to use pasteurized egg whites)
- ¾ cup of sugar
- 1/3 cup of water
- A small pinch of salt
- ¼ teaspoon of pure vanilla extract
Instructions
Step 1
Place a saucepan with water over a burner and bring it to a boil. Then, lower the heat of the stove. Now, take a heatproof bowl and set it over the saucepan and make sure the bowl doesn’t touch the hot water of the saucepan.
Step 2
Add the egg whites, salt, sugar, and water to the heatproof bowl. Stir the mixture until the sugar has dissolved completely. Then, remove the bowl and transfer the mixture to another large copper/stainless steel/ glass bowl.
Step 3
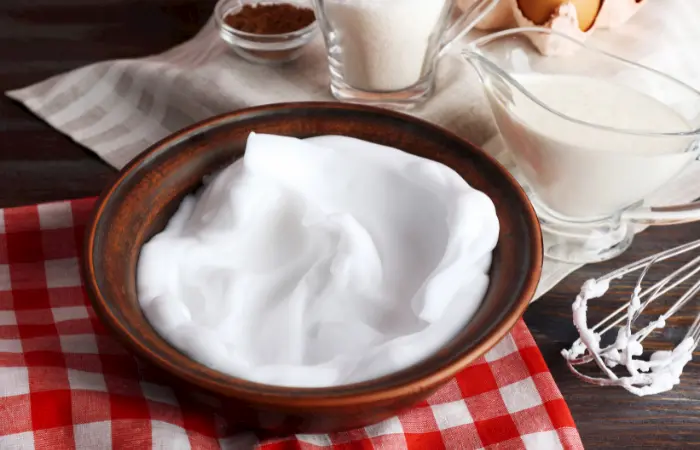
Now, start beating the egg whites on medium-high with an electric mixer. About 3 to 4 minutes later, you will notice glossy, stiff peaks. At this point, reduce the speed of the mixer to low, add vanilla extract, and beat until combined.
Use this whipped frosting immediately.
Simple & Easy Whipped Egg White Recipes
If you wonder what to do with whipped egg white, I have some easy recipes to share.
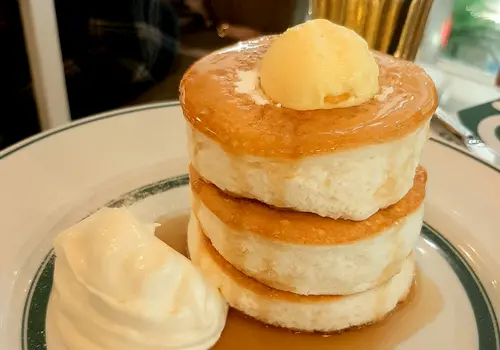
Pancake Recipe with Whipped Egg White
Whip egg whites are necessary to give the pancake a fluffy and soft texture. They also give them extra height.
Ingredients
- 1 and ½ cups of all-purpose flour
- 1 and ¼ cups of milk
- 3 tablespoons of powdered sugar
- 2 teaspoons of baking powder
- 3 large egg whites and 1 egg yolk
- ½ teaspoon of salt
- ½ teaspoon of vanilla extract
- 4 tablespoons melted and cooled unsalted butter, plus additional for brushing
- Butter and maple syrup (for serving)
Directions
1. Mix the flour, sugar, baking powder, and salt in a big bowl. Take a medium bowl, combine the milk, egg yolk, melted butter, and vanilla in it. Then, take a separate bowl and beat the egg whites until firm peaks form.
2. Using a rubber spatula, stir the milk mixture into the flour mixture until just mixed (a few lumps are acceptable). Now, take the whipped egg whites and gently fold them with the flour and milk mixture until combined. Keep as much air as you can in there while folding cause this is the key to making the pancake fluffy, and do not overmix.
3. Lightly coat a griddle or big nonstick skillet with butter and heat over medium-low heat. For each pancake, pour 1/4 cup batter onto the pan and heat for around 3 minutes until bubbles appear on the top and the bottom is gently browned. (Reduce the heat to low if the pancakes are browning too soon.)
Turn over and cook for another minute or until golden on the opposite side. Place the pancake on a plate. Repeat this process with the remaining batter, adding extra butter as needed to coat the pan. And finally, serve with syrup and butter on the top.
Easy Meringue Cookies
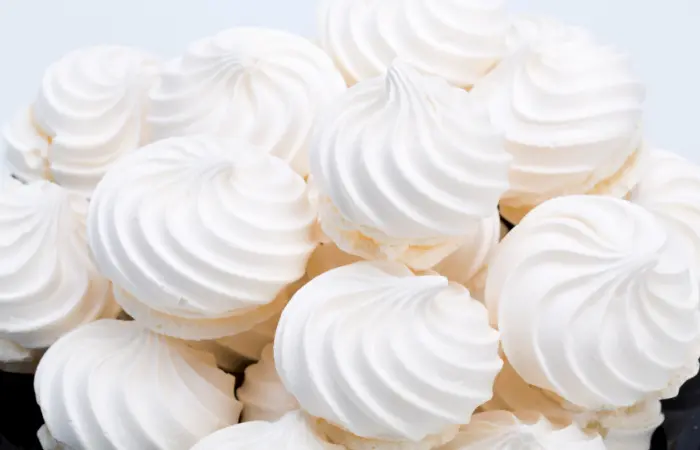
Egg whites, brown sugar, vanilla, and a plain cinnamon sugar garnish are used to make these simple meringue cookies. This cookie is fat-free, thanks to egg whites.
Ingredients
- 3 large eggs (room temperature)
- ¼ cup of brown sugar
- ½ cup of granulated sugar
- 1 teaspoon of vanilla extract
- ¼ teaspoon of cream of tartar
- 1/3 cup of cinnamon sugar (for topping)
Directions
1. Preheat your oven to 250 F. Position one oven rack in the top third of the oven and the other in the bottom third.
2. Put sugar in a food processor for around 60 seconds. You may use a blender like a food processor or skip this. It will just make the sugar finer and help it dissolve quickly. And if you have superfine sugar, then use it with brown sugar.
3. Beat the egg whites till foamy, add cream of tartar, and then add sugar and beat until stiff peaks form. After that, add vanilla extract and mix until combined. Your meringue is ready.
4. Spread parchment paper over two baking sheets. To prevent the parchment paper from moving while you work, place a tiny dot of meringue under each corner.
5. Place a few small meringue mounds on the parchment paper using a spoon. Or, if you have a fancy star-shaped tip, pipe the meringue using that. Over each mound, sprinkle a little cinnamon sugar.
6. Bake for an hour, turning the baking trays every 30 minutes. Test a meringue by taking it out. It should be dry in the center when you split it in half. Then, turn off the oven, leave the cookies for 1 hour longer and finally enjoy them.
The above two recipes are easy to make and don’t require much time. Except for these, there are various other recipes, such as meringue pie, egg white frittata, pavlova, cake with whipped egg white, and so on.
Anyway, we have a fun time learning techniques and recipes, and now it’s time to conclude this topic here.
Conclusion
Hopefully, now you have a detailed idea about how long to whip egg whites, how to make it perfectly, what add-ins are needed to make them stay in shape, and some tips that can save you from a mess.
Now, head towards your kitchen, make delicious recipes and enjoy with your loved ones.
I hope to meet you through another writing, till then have a great time.
Frequently Asked Question
Can you eat raw whipped egg white?
There is a certain possibility that food-borne pathogens like salmonella could be present in raw egg whites. The risk is slight, but it’s possible that you will get sick from eating that. So, if you are going to eat raw whipped egg whites, then it’s best to use pasteurized egg whites.
Meringue powder is another option, which is just powdered egg whites with a few extra components added. These are also pasteurized, and when reconstituted with water, they will whip up just well.

