Are you planning to try your hands at making pastry dishes? Then, I guess you are going through different recipe videos or books these days. And, of course, one of the necessary tools that you find in every recipe is a pastry blender. Right?
But what is a pastry blender, how does it work, or can I use other tools if I don’t have this? All these questions have risen in your mind while you came to know about this kitchen tool.
Well, that’s why I am here! To feed all of your curiosity!
Not only will I give you a detailed introduction to the pastry blender, but I will also teach you every technique you need to know to use it, what other equipment you may use instead of it, how you can create the best pastry dishes with it, and many more.
So, stay with me till the end, and you will be able to learn every little thing regarding this tool.
What Is A Pastry Blender? Get Introduced to Each Part
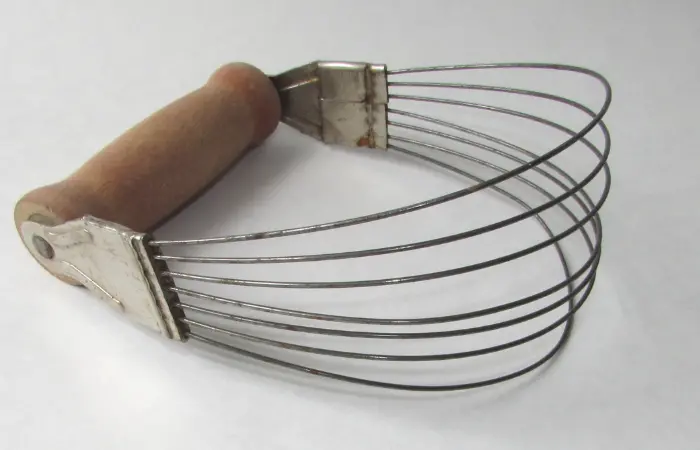
A pastry blender is a handheld kitchen tool that mixes solid fat (like butter) into flour to make pastry dough. It has a u-shape that features a handle on the top and a series of wires or metal strips at the bottom connected to the handle.
You are required to press this tool’s wire into your butter and flour repeatedly until it forms a dough. While making pie crusts or other flaky pastries, you need to rub the butter into their flour mixture.
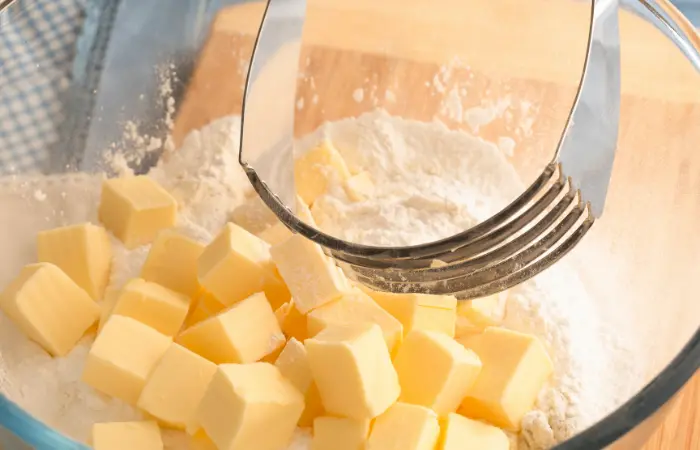
Although you can use your hand alternatively, a pastry blender can do the job much better, giving you less flaky dough. That’s why a pastry blender is an ideal option, and every pastry chef likes to use this for their yummy pastry recipe creation.
As you already know, this tool has two parts: a handle for holding and a series of wires (known as tines) to mix butter with flour. For your better understanding of this tool, I will now describe the two parts in detail.
1. Handle
The handle is the part that is used to take a strong grip on the tool. Traditionally, the handle is made of wood which is much more comfortable for grip. Metal and plastic handles are also available, but most users need help finding them comfortable to use.
The only disadvantage of a wooden pastry blender is that it ages and degrades quickly due to water exposure. In this regard, metal and plastic pastry blenders dominate due to their robust durability and convenient cleaning procedures.
2. Tines
These are the stripes that are connected to the handle. The tines are curved so that you can cut all the butter stuck to the curved side of your mixing bowl.
By the way, there are two types of tines available.
- Wire tines
These are the traditional tines that are usually attached to the wooden-handled pastry blenders. These were popular before metal-bladed tines were made.
- Blade-like tines
These are thin blades that are way sharper than the wire ones. That’s why it is more convenient to use, as it requires less pressure to cut the butter. It is also sturdier and holds its sharpness better than the wired ones, even with regular use.
Usually, 3 to 5 metal blades or wires are found in a pastry blender. Although every option works fine, five blades can be slightly more efficient.
Alright, another fact that people often need clarification on is whether a pastry blender and pastry cutter are the same or two different tools. So, let’s remove the confusion.
Is Pastry Blender And Pastry Cutter The Same? Remove Confusion!
Pastry blenders and pastry cutters are different names for the same handheld tool. It is also known as a dough blender. People need clarification because of the two terms blender and cutter, as they indicate two different works.
Anyway, now that you got introduced to this tool, it’s time to learn: what is a pastry blender used for?
What Is The Use of A Pastry Blender?
You will need a pastry blender when you want to mix a small amount of butter or fat into your flour mixture. It helps distribute tiny pieces of butter evenly and gives you the signature flaky texture.
Now, you may wonder why you need to use a pastry blender, as other tools like a food processor can also do the same job, mixing flour and butter.
So, the butter is meant to be cut into tiny bits and distributed evenly throughout the dry ingredients instead of incorporated into them.
And if you cut the butter appropriately, your baked goods will have a crumbly texture and be flaky.
The tiny pieces of butter in your dough release steam when they melt, which grow and create air and fat pockets throughout the dough. After the butter melts, the small pockets are left behind to separate the layers of baked dough. And this is what gives your pastry its delicate, rich buttery finish and flaky texture.
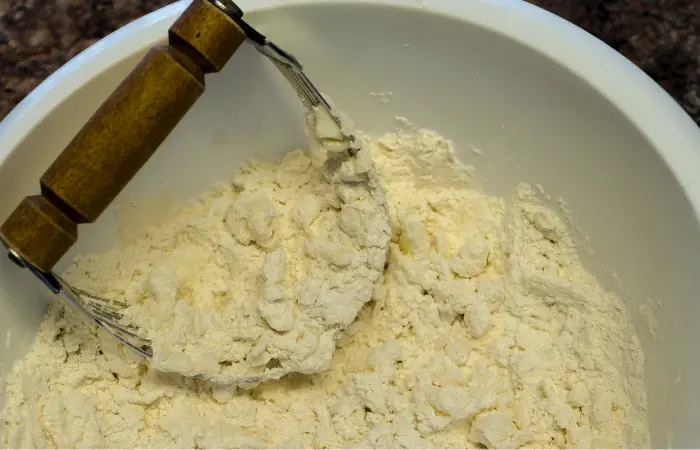
While a food processor or other mixing tool can also break the butter into dry ingredients than a pastry blender, doing so for just a few extra seconds can give the dough a sand-like texture that may not be suitable for many recipes.
Hence, using a pastry blender is less likely to overmix the dough and spoil the consistency mistakenly as you have full control of the tool.
However, all of your efforts will go in vain if you don’t know how to use a pastry blender properly. So, make sure to go through my next segment to learn all the tricks and tips.
How to Use A Pastry Cutter/ Blender? Learn Proper Techniques
While using a pastry blender, you need to follow some method to cut the butter or fat into flour so that the little lumps of the butter remain. Otherwise, it won’t give you the flaky consistency.
And to achieve the right texture, you must start with cold butter.
Step 1: Use Cold Butter
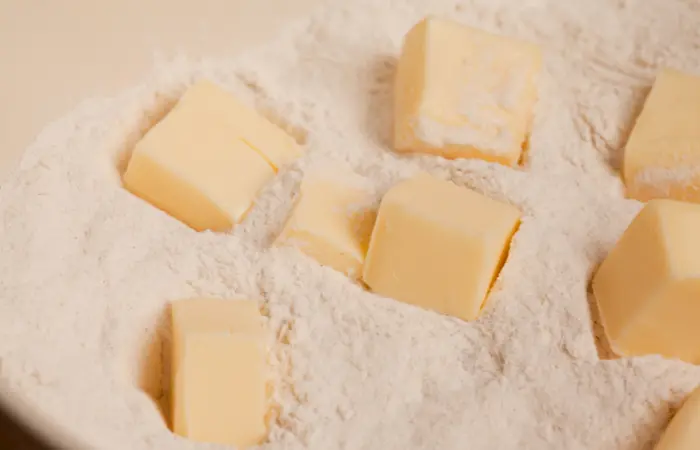
Always start by taking out cold butter from the fridge, cutting them into 1-inch cubes, adding them to the dry ingredients immediately, and pressing. Avoid leaving the butter out while taking care of other things because it could get too soft and make it more likely that you’ll overmix it.
If you still need to prepare your dry ingredients, then put them back in the fridge after cutting your butter into cubes.
Warm butter softens and dissolves into the flour, resulting in fewer lumps and a less flaky texture, which is not what you want. Therefore, the first step to making the perfect pastry is to ensure that the butter is cool.
When you place the pastry in the oven, the butter chunks should still be solid. That’s why you must start with very cold butter that has just been removed from the refrigerator to avoid the butter softening too much.
Step 2: Measure The Flour And Then Add Butter
It is highly important to measure your flour properly since the flaky texture you want depends on the proportion of butter to the flour and how the butter chunks mix with the flour. When measuring flour by volume, sifting ensures a uniform amount.
So, make sure to sift the flour before using it, and use as much as is mentioned in your recipe. After that, add other dry ingredients like sugar and salt to the flour in a mixing bowl. Then, add your cubed cold butter on top and start cutting with your pastry blender immediately.
Step 3: Continuously Mix with Your Pastry Blender
Grip the handle of the pastry blender and press the blades into the butter to cut them into tiny pieces. To adjust the consistency of the mixture, quickly twist the blender a half-turn, lift it up, and then quickly repeat the process many times.
You might want to pause and scrape the butter from your tool as it sticks to the blade. But you don’t have to do it. Since time is of the essence, keep mixing, and the butter will eventually separate on its own.
Step 4: Mix Until You Reach The Right Texture
Unlike other types of dough, you are not required to fully incorporate the butter into the dry ingredients. So, keep in mind that you are trying for little, whole chunks of flour-coated butter. Ensure that you are not overmixing it by focusing on your work progress.
Depending on the recipes, some require “pea-sized” lumps, while others specify that the flour mixture should resemble crumbs. So, make sure to mix until you reach the texture that your specific recipe calls for. Remember that the flakier you want your pastry to be, the bigger the butter lumps need to be.
Step 5: Finished Stage!
The butter chunks in the flour mixture should still be visible after you finish mixing. At this stage, you may store the dry ingredients with the butter in the refrigerator until you use it for baking. It’s because once you mix the other wet ingredients like water, milk, or eggs, you have to bake them right away, as the moisture will activate any leavening agents in your dough.
6 Alternatives to Pastry Blender
Now, suppose you don’t own a pastry blender; what are you going to do? It is easy to think about alternatives to countertop blenders, but when it comes to pastry blenders, you have to think deeply about using other tools as a substitute.
Well, you don’t have to think much as I will guide you in this regard now. So, go through each alternative tool and find the one you can work with.
1. Utilize A Food Processor
For a quicker, more hands-off method, you can use a food processor to make pastry dough. But, as I said before, you don’t have any control over the process while using a food processor, so make sure not to overwork the dough. Anyway, the question is how to do it.
Pulse all the dry ingredients with small pieces of butter in your food processor. It will take up to one or two minutes to achieve a nice crumbly texture. However, not every food processor is the same, so you should check the dough from time to time and process it accordingly.
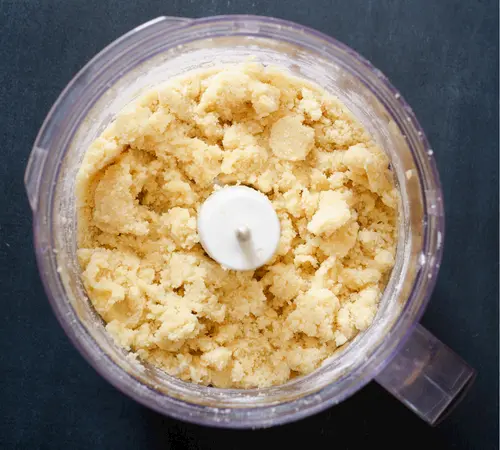
A food processor also works well for cutting butter into ingredients like sugar, oats, and more for toppings like crumbs.
2. Use Two Butter Knives
You will need two butter knives and a large bowl for this method. Start by putting all the dry ingredients in the bowl first, then place small pieces of butter on top.
Hold one knife in each hand, cross them and drag the knives across the bowl back and forth, cutting the butter each time. Keep doing this until you reach desired consistency. The process will take about 5 minutes, depending on the quantity.
Note that you will have to act fast to avoid the butter softening too much. Check the below video to understand the process better.
3. Use A Fork
Instead of two butter knives, you may use a single fork. The fork needs to be dry before you start. Also, ensure the chunks of butter, lard, or shortening you need to mix are as small as possible.
Add all the dry ingredients first, and then add a small portion of butter. Don’t put all the butter at once, as it will take much more effort to press. Use the fork to mash the butter, add another batch, and keep pressing. Sooner, you will reach the perfect consistency.
Remember that this is a long process and will require hard work, so you have to be patient.
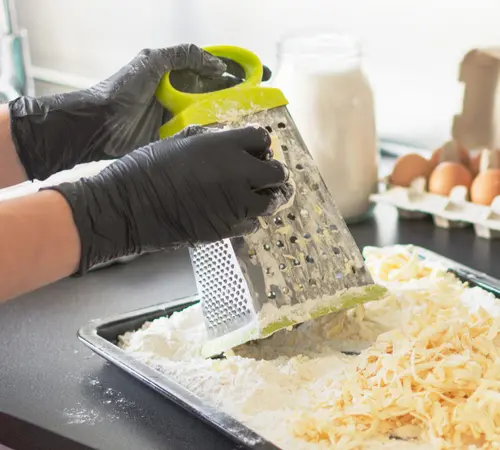
4. A Cheese Grater
You can also consider a cheese grater instead of a pastry cutter. Make sure to start with very cold or frozen butter for this procedure, as you will hold the butter in your warm hands, which can make it soften relatively quickly.
Use a cheese grater’s medium side to grate sticks of butter. After that, mix the butter pieces with the dry ingredients and use your hands to make a dough ball.
Although this approach will work, it is not advised due to how much butter you will have to handle. Also, the butter can be too finely grated by a grater, which could produce dense pastry dough. So, only use this tool if you don’t have the other alternatives I mentioned.
5. Potato Masher
The closest alternative to the pastry blender in terms of the working process is a potato masher. These devices make a minimal mess if your bowl is deep enough. In addition, the ingredients will mix quickly. Also, you won’t get tired.
Hold the potato masher handle and press the bottom metal part on the butter. Keep mashing until the desired outcome.
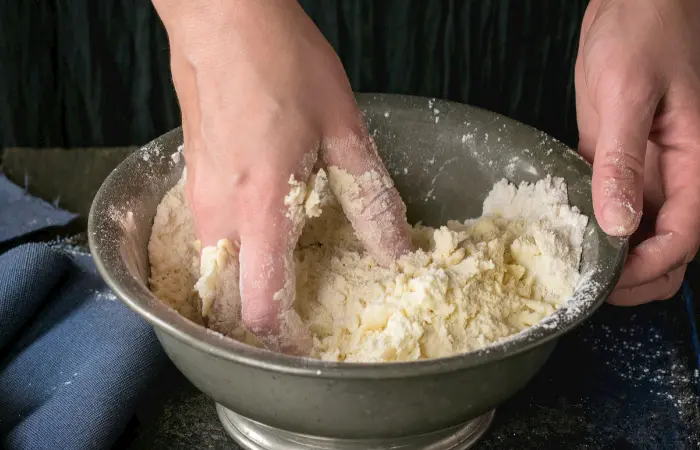
6. Use Your Hand
If everything else fails, your hands can be your final savior. Chop the butter first and keep it cool until you add them to your dry ingredients.
You should squeeze the butter between your fingers before adding it to the dry ingredients. By doing so, the pieces will be more easily broken up and combined with the flour. Scrape off any extra that sticks to your hands using a spoon.
While mixing, if your hand begins to warm up or become wet, wipe it off since the warmth could cause the butter to melt. Some people naturally have higher body temperatures, which may influence how warm their hands feel.
Because of this, using your hands for work like this may not be particularly reliable. However, you can prevent your hands from directly touching the butter by wearing gloves.
Okay, I have finished mentioning all the alternatives to the pastry blender. Although there is always a substitute for every kitchen tool, everything is required for its specific purpose to make the best possible outcome.
Therefore, no matter what, a pastry cutter will always give you a better result than the others.
What Features to Look for in A Pastry Blender?
After learning about pastry blenders, you may want to buy one for yourself. In such a case, you need to consider a few things. And that’s what I am gonna tell in this segment.
Materials
Typically, most pastry cutters have stainless steel blades, and that’s what you should go for. It is a sturdy, long-lasting, heavy-duty material that keeps up to handling the coldest butter and the toughest dough while maintaining its sharpness throughout time.
Most stainless steel pastry blenders are dishwasher-safe and can resist rust and corrosion. So, if you wanna avoid handwashing, go for this material.
While talking about the handle, it comes in a wider variety of materials. But you should go with the one that is both strong and comfortable. Many products use rubber grip, which helps reduce pressure while being used.
Other handles are also available, like wood, stainless steel, or plastic. These are typically dishwasher-safe, except for wood. So, if you prefer handwashing and fast drying, wood is the one for you.
Style
When it comes to pastry blenders, there aren’t many stylistic differences, but there are a few things to consider. Usually, they have four or five blades. Both options are functional, though pastry blenders with wider bodies and five blades may be slightly more effective.
In addition, some blades are thicker and duller, and others are thinner and sharper. While the thicker ones are better at mixing and mashing, the thinner ones are better at cutting.
You can also go for the pastry blenders with wires. Although they aren’t as durable as blades, they can easily handle small batches of highly malleable dough.
Now, if you have large hands, consider the handle size too. Go for the larger models that will be comfy for you to use.
Must Try Recipes Using A Pastry Blender
If you end up buying a pastry blender or already have one, I want you to try these two simple but yummy recipes. And the first one is one of my all-time favorites.
1. Flaky Pastry
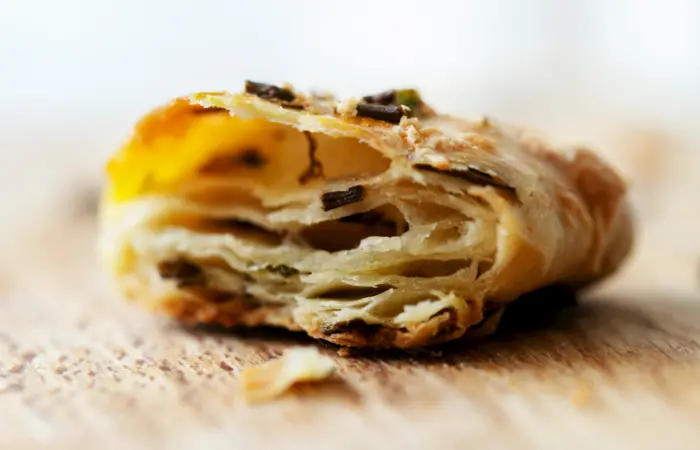
You will need just 4 ingredients to make pie crust from scratch.
Step 1: Start by mixing 225 gm of sieved flour and a pinch of salt in a bowl. Add 170 gm of cold butter to the flour mixture. Now, start using the pastry blender, and cut the cold butter until they become tiny crumbs. Slowly add ice water and mix until a sticky elastic dough forms.
Step 2: Roll the dough with a rolling pin until it is 4 mm thick on a surface dusted with flour.
Step 3: Wipe away any excess flour, then equally distribute the remaining butter (in spots of about 1 cm) over the bottom third of the rolled-out crust.
Step 4: Fold the pastry in quarters, bringing the butter-free end to the center and then folding the other third down. With your fingers, firmly press the crust’s edges together. Then, turn the pastry around and lightly roll it out once more until it is 4 mm thick.
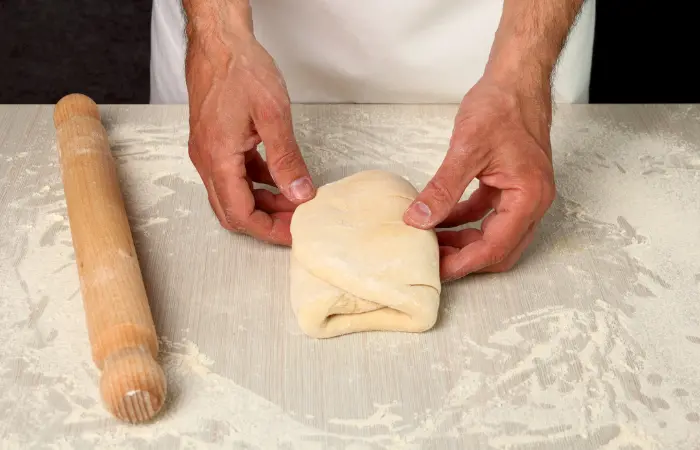
Step 5: Repeat putting butter dots, folding, and rolling twice more and cover with plastic wrap and let it chill in the fridge for 30 minutes.
If using pastry as a pie with filling, preheat your oven to 200 C, 400F, or gas mark 6 while the crust is chilling. It takes 20 to 35 minutes to cook. When baking the pastry by itself, the oven should be set to 230C, 450F, gas Mark 8, and baking should take 8 to 10 minutes.
2. Buttermilk Biscuits
To make biscuits:
Step 1: Combine 2 cups of all-purpose flour, 1 tablespoon of baking powder, and 1 teaspoon of salt in a large bowl.
Step 2: Add 85 gm of cold unsalted butter and blend with a pastry cutter until it forms a crumbly texture.
Step 3: Add 3/4 cup of buttermilk and 2 teaspoons of sugar and combine.
Step 4: On a surface dusted with flour, roll out the dough with a rolling pin into a thick rectangle and fold it into half. Turn the dough, gather any crumbs, and flatten it back into a rectangle again. Repeat the folding and rolling process 2 to 4 more times. At last, roll it about 1/2 inch thick.
Step 5: To make the biscuits, use a biscuit cutter or a circular cookie cutter. Put them on a baking sheet, brush buttermilk, and bake until golden brown.
Closing Words
From what is a pastry blender, how to use it to what you can use as an alternative, I hope you were able to learn everything from my writing. Try some recipes using it and give your loved ones a delicious treat!
Frequently Asked Question
Why is cold butter needed for pie dough?
If the butter is warm, it will mix with flour too well, making the dough difficult to work with, and the final product will be tough or cracker-like. Therefore, cold butter is a must to ensure the super flaky finished crust. In this way, the butter will stay in solid chunks in the dough and turn into layers when baked.

