Every kitchen has a blender and it’s one of the most useful electric appliances. Most homes use this appliance several times every day to blend food and liquids. They’re so versatile and easy to use, plus they’re one of the cheapest kitchen appliances.
Because of that, when your blender not working, it can be very inconvenient for meal planning. Even though it’s hard to accept, it’s true that it can happen at any time. Sometimes you’re just operating normally, and it suddenly stops working. It is also possible that your blender will no longer turn on.
If that’s the case, what can you do? Maybe you will be worried and thinking deeply that why is my blender not blending. Don’t worry anymore! Today you will get the answer to why does my blender not work. So, let’s start and find out why your blender isn’t blending or working and get some honest solutions.
Why Is My Blender Not Blending?

There are many reasons why my blender does not blend. You can have unimaginable problems like a bad energy source or appliance-killing problems like a burned-out motor. Take your pick.
In most cases, though, the problem isn’t serious and can usually be fixed with a few teaks and a few replacement parts if you have a thorough list and some time to spare.
In the following, I’ve listed the most common causes of this problem, as well as step-by-step instructions on how to resolve it. Once you reach the end, you can be sure that you will have a brand-new appliance.
What Can You Do Initially When Your Blender Not Working?
The following will provide you with some important tips and tricks that you should consider initially before you begin troubleshooting your blender:
Don’t Blend for Too Long
The first thing you should do in order to ensure that your blender is working properly is to take the time to avoid blending for an excessive amount of time. In order to blend effectively with a compact blender like this, it is important to blend slowly, in bursts, rather than for long periods of time.
In this way, you will prevent your motor from becoming overworked. As a result, your motor will not burn up or overheat. It also allows you to shake the food as you blend so that it can reach the blades and get blended.
Add More Water
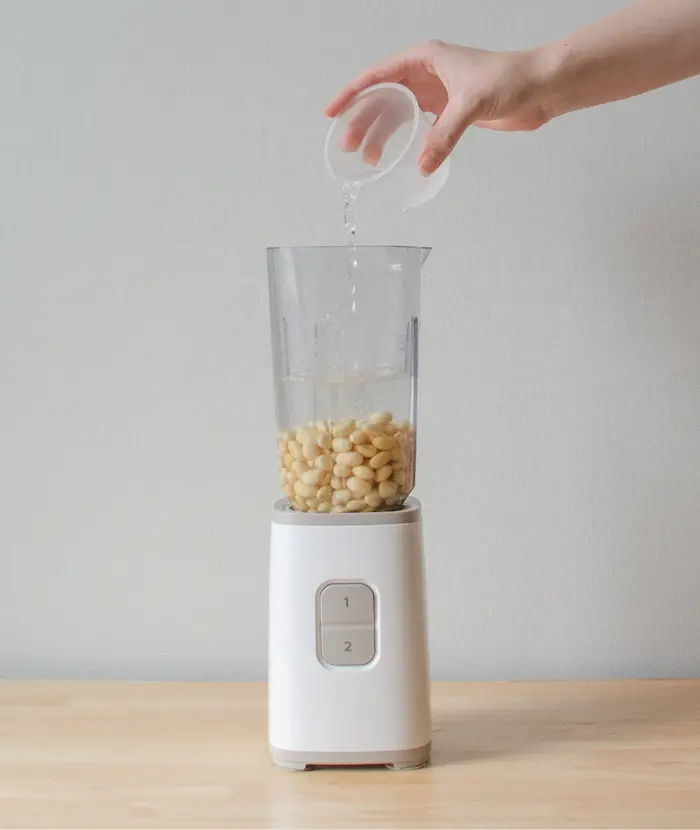
Another thing you can do is add a little more liquid to your blender. If there is an extra liquid added to the food, it will help move the food down and help to blend up the food. When you add liquid to your food, it adds a bit of fluidity so it can blend fully and completely.
Check Power Settings
If your blender blends but doesn’t blend things correctly, you might have the power setting too high or too low. If your food becomes pureed and you want it chunky, you should turn down the blender setting.
After you finish blending, if you see large bits or pieces but the consistency isn’t right, you should turn up the power setting on your blender.
Whenever you’re blending a new food, it’s best to blend it slowly or to pulse the blender several times to see how quickly it blends. You can continue to pulse or blend until you achieve the consistency you are looking for.
Check The Lid
It is also important to make sure that the lid is on correctly and also that it is tightly secured when it is secured to the container. As a result, the blender will continue to function properly and will ensure that there are no leaks as well as the ability to keep the blender working.
Understand How the Blender Works
In case you are wondering, why is my blender not blending at all? Then consider some common problems and check them before moving on to repairing the blender or sending it back to the manufacturer for repairs or replacement.
In most cases, blenders come with a guarantee; if you are unable to fix the problem yourself, send it back for replacement or repair.
If you know how blenders work, you can figure out which parts might be wrong. There’s a motorized base with all the speeds, but there’s also a seal and a drive stud.
Easy Troubleshooting Techniques You Can Do Initially
There are a number of common reasons why the blender isn’t blending, along with some basic troubleshooting techniques that you can try to resolve the problem.
1. Multispeed Switch
One of the most important components of a blender is the multispeed switch. If you (or someone else in the family) press the buttons too hard, the device can be damaged. There is a possibility that this piece will stop working or malfunction, but it is possible to fix it easily.
In the first step, you will need to remove the blender’s base. The switch is attached to the base by screws or clips; you can access it under the base’s faceplate or from within.
It is important to inspect the switch before you remove it. It is often possible to tighten the switch back up without any issues if it just had a loose terminal before being removed. In the event that you see blackened terminals or wires, it is likely that it has shorted out and needs to be replaced.
Using a multitester or continuity tester, you can check that the device is getting consistent power. It is possible for liquids to get inside and clog the switch since it is located at the front of the unit.
Using electrical contact cleaners or compressed air to remove the sticky buildup will allow you to press harder, which might start the blender.
2. Multispeed Fuse
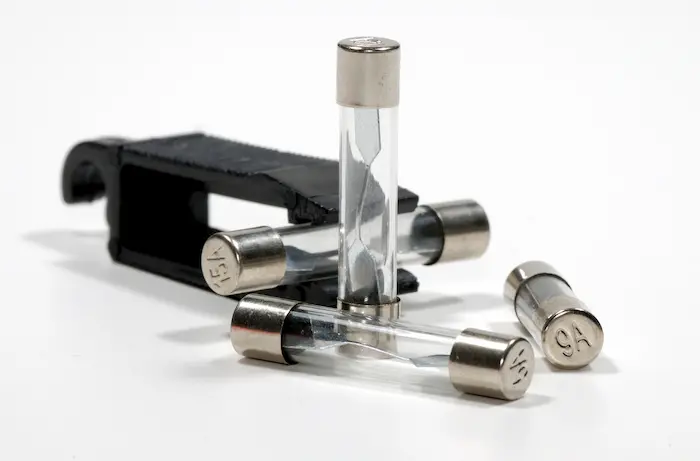
There is also usually an in-line fuse on blenders to protect the motor from overloading. Whenever the motor sees excessive electrical current, the fuse blows.
You will need to remove the blender’s base and check the wiring between the motor and the multispeed switch for fuses. Use your multitester to check the fuse after disconnecting that wire. If you want to replace the fuse yourself, you can easily buy a new one and replace it yourself.
3. Blade Doesn’t Turn
When the motor is working well, but the blade is not turning properly, or the food does not seem to break down properly, you may have a loose drive stud in your machine. If you need to tighten it, you must remove the base and turn the blender upside down.
You will notice that the drive shaft protrudes from the bottom of the motor. You will need to grip that shaft with pliers or a wrench and turn the blender on its side so you can attach another wrench to the drive stud inside the base. To tighten the drive stud (inside the base), hold the drive shaft steady and turn the drive stud clockwise.
4. Blade Servicing
The blade itself is simple in design and function. It rotates because of the drive stud, which allows it to blend and chop food. It is most common for the jar to leak liquid.
A simple solution to this problem is to tighten the base. If that isn’t enough, you may need to replace the gasket.
If you turn the drive stud but do not turn the blade, check the socket that holds the drive stud. There is a possibility that it is worn out and needs to be replaced.
But if your blender not turning on then what can you do? Let’s learn some common reasons and solutions.
Some Common Reasons Why is My Blender Not Turning On: Problem & Solution
If your blender is not turning on, one of the items below is probably to blame. Let’s take a deep dive into it.
Problem #1 A Bad Outlet
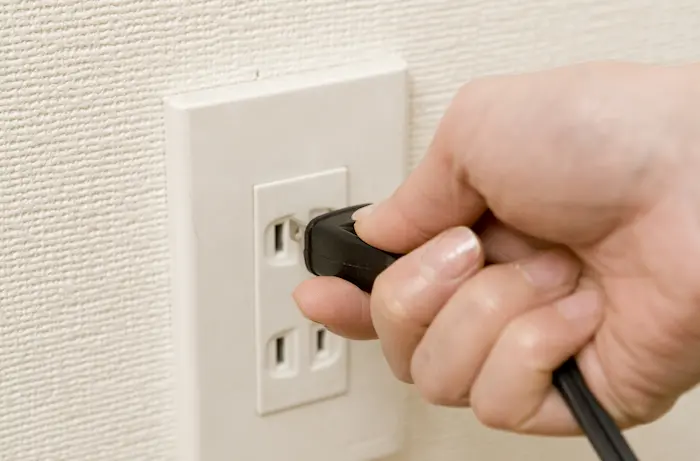
Before diving into your appliance’s guts, it’s important to consider external factors that might be contributing to the problem. It’s possible that nothing is wrong with your blender.
You could be having trouble turning on your appliance because a bad wall outlet isn’t providing enough electricity. This could explain both your issue and the tripping of your breakers whenever you plug something in.
Solution:
Unplug your blender carefully, then move it to another part of the house and plug it in there.
Once you find out that the appliance works, the mystery is solved.
In the event that this does not resolve the issue, there’s a possibility that the wall outlet was fine, and the power cord was faulty, but we’ll deal with that later.
Use your multimeter to test the conductivity of the suspicious wall outlet if you feel confident and want a challenge. Whenever you do this, be very careful and take all necessary safety precautions.
Problem#2 A Damaged Cord

Your power cord should be the next thing you check if your wall outlet does not work. This is the next link in the energy supply chain.
Being so tough, one might expect their power cords to be virtually indestructible, wouldn’t you? No, they definitely aren’t. In fact, it is fairly easy to damage them. You only need to keep them tangled or pressed against a wall at an odd angle.
Besides causing your blender not to work, this can trip your breakers and cause short circuits, which can shorten your appliance’s lifespan significantly. Fix this problem as soon as possible.
Solution:
You might need a different power cord.
You can test this by using a spare cord if you have one since not everyone has one.
If you have already tested your wall outlet and it is working correctly, you can use the new cord there, otherwise, unplug your blender and take it somewhere else. Did it work? That’s great!
Problem #3 A Faulty Switch
Ok, so the power cord and the outlet are both fine; that’s actually good news. That means that you won’t have to worry about them for a while, which is great news.
Our next step is to check the activation switch.
In the case of damage or regular use, this component may wear out or fail, preventing you from turning your blender on or off.
If you suspect this is the problem, you’ll have to go inside, so prepare your gear.
Solution:
Don’t worry; things won’t be too complicated here. It might get a little tricky, but don’t stress. Here are the steps you need to take:
- You need to unplug your appliance from the outlet and flip it upside down carefully.
- Depending on your model, remove the screws at the bottom with either a flat or a cross screwdriver.
- Make sure you expose the guts of your appliance.
- Remove your switch carefully.
- Make sure the switch is connected by using your multimeter.
Problem #4 A Blown Fuse
It is possible for blackouts and other surge-causing events to damage the internal parts of your appliance. Fortunately, most electronics have fuses to prevent this.
You can think of these little devices as guardians if you are unfamiliar with them. When an electrical surge occurs, they break, or “blow,” which prevents the surge from reaching and frying other components inside the appliance.
Your blender might not be working after a blackout because a fuse inside it may have blown. The news isn’t entirely bad, however. Remember, you only have one, so replace it as soon as possible to prevent future spikes from damaging your blender.
Solution:
The steps from point #3 will help you expose your appliance’s internal components and identify the fuse. It is very easy to spot a blown fuse, so you do not need a multimeter to test it for viability. You just need to look for blackening inside its glass body, as well as broken filaments.
Problem #5 A Burned-out Motor
It’s bad news from any angle.
Depending on how old your blender is, this could be caused by regular wear and tear or user error. When the motor in your blender burns out, it cannot spin the blades or perform any other function.
Identifying this as the culprit should not be too difficult. Whenever your blender’s motor burns out, it usually stops working abruptly in the middle of a cycle. The burning smell is also present.
In this case, you will need to take a look at your warranty, as it will play a vital role in your decision.
Solution:
Burned-out blender motors are not expensive to repair, but things change when compared with the appliance’s cost. Your appliance can be repaired for free by your manufacturer if it is still under warranty.
If your blender’s warranty has expired, your best bet is to purchase a new one. One time I had this happen, and I had to pay almost 70% of what I originally paid for repairs and labor.
It’s not all bad, though. You might be able to score a great deal online.
What If Your Blender Won’t Spin: Problem & Solution
After going over all the possible reasons why is my blender not working, it’s time to take a look at the spinning issue that might be causing it to not work. There are a number of reasons why your blender won’t spin.
Problem #1 Improper Blade Coupling
Even though it seems obvious, it happens more often than you think.
You might have put the blades back on incorrectly if you take your blender apart for cleaning regularly (well done!). They might not be able to turn or make adequate contact with the motor as a result.
There is definitely a big deal here, despite how it may seem. It is dangerous to operate your blender with improperly positioned blades because they may fly out and strike you or others. If you suspect this is the problem, you should act immediately.
Solution:
Put your blender back together consciously after disassembling it. You will have eliminated a potentially dangerous possibility, even if this doesn’t fix the problem.
Problem #2 Jammed Blades
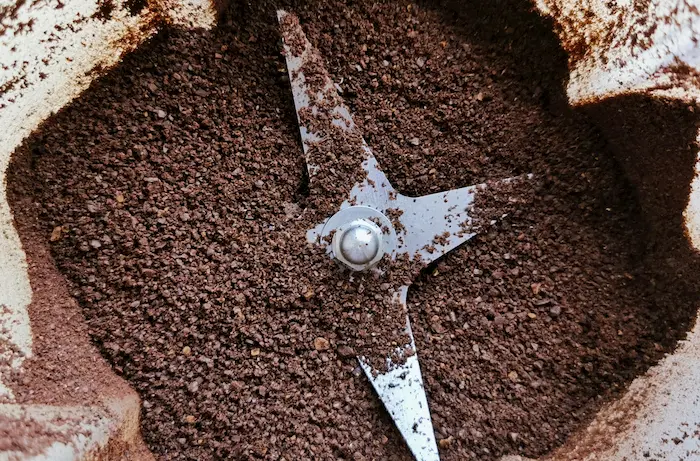
Disassembling your blender from top to bottom and thoroughly washing each part may be time-consuming and troublesome, but it’s essential.
The bottom part of the blender jar, where the blades meet the motor’s body, may become clogged with residue if you fail to clean it between uses. This will not only damage your gasket much faster but also jam your blades.
There might be some leftover food in your blender that is causing your blender not to spin.
Solution:
If your blender is plugged in, remove the jar with the blades attached, then follow these steps to disassemble it:
- Use gloves or be very careful; the blades are quite sharp. Unscrew the base of the jar where the blades are located.
- Put the jar next to you after removing the blades from the base
- Place the rubber gasket (small ring) somewhere safe after removing it
- Ensure that each part is cleaned individually and dried before reassembling (again, handle the blades with care).
You will not be consuming old food leftovers between meals if you do this every day, as it prevents residue buildup and keeps your blender operational.
Problem #3 Using too Much Food

A blender’s motor and blades are very powerful, but overfilling the jar could damage them.
What is too much when it comes to blenders? It depends on your model, but most manufacturers have a maximum capacity recommended in their user manuals. It is designed to prevent you from putting too much stress on your motor.
If you usually fill your blender with solid foods, you may be decreasing its lifespan and causing your blades to malfunction. Depending on how well your blender spins, you may need to adjust the number of batches.
It is important that you do not overfill the bottle. Making my own peanut butter taught me this lesson the hard way. I burned out my motor!
Solution:
Read your user manual again; you’ll likely find the recommended maximum capacity there.
If you frequently prepare large batches for guests or your family, you might want to consider getting a larger jar or dividing your preparations.
Problem #5 Not Using Enough Liquid
It is important to avoid overfilling your blender, as well as to keep your preparations sufficiently liquid.
Some blenders are designed to work with certain amounts of water or other liquids. Think about it, smoothies, shakes, salsas, soups, whatever you like. There is always water or milk in them, and they are never prepared dry.
Your blender may not be spinning because you are not using enough water. In my experience, there is no recommended amount. It’s more of a matter of trial and error, as well as dedicated observation. Depending on how thick you want your preparation to be, you may need more or less liquid.
Solution:
Watch carefully.
When the motor strains too much during the blending process, shut it off and add a bit more liquid.
A blender with an overworked motor will not likely spin properly, the blades will not spin, the blender will smell burning, and the blender make a loud noise from within. You will dramatically reduce the lifespan of your appliance if you fail to address this issue.
Hopefully, now you understand why your blender not blending or working. However, we all make some common mistakes with blenders in our daily lives. It is now time for us to disclose these common blender mistakes that can help us to operate our blenders properly. As a result, we won’t have to worry about the blender not working.
Some Blender Mistakes That We Everyone Make
Investing in a Wimpy Machine
A blender is an essential kitchen tool, so make sure you buy a good one. There are three main parts to a blender: a motor, a blade, and a container. Investing in a wimpy machine leads to early blender damage. To ensure that your machine lasts, choose high-quality machines that have these three components made from sturdy materials.
Thinking We Have to Spend More to Get a Good Blender
It’s probably a myth that quality has to be unaffordable. In reality, this isn’t true, and a budget-friendly blender also offers some great features. Depending on your budget, you can do a lot with your blender.
Filling It to the Very Top
Just like human beings, blenders perform best with a little breathing room, and one of the biggest blender mistakes is overfilling them.
When blending hot things, especially soup, don’t fill the blender bowl to the brim.
Stay below the capacity line on the container when processing hot ingredients in batches.
Going From 0 to 100 Too Quickly
When blending something, it’s also a good idea to take your time.
You should start on low and work your way up to medium, then high. It reduces wear and tear on the motor and makes everything blend more smoothly.
Starting Whole
To help your appliance do its job easier, slice, mince, and grate fibrous vegetables (such as carrots, ginger, and celery) to make them easier to incorporate.
When you measure food in small pieces, you can add tiny amounts to taste as you go along.
Don’t Take a Break
Whenever you make pastes, nut butter, or thick dips, give the motor a moment to rest. If you want to prevent your machine from overheating, process it in short intervals of about 30 seconds.
After halfway through processing, press ‘stop’ and scrape down the container’s sides with a rubber spatula. By doing this, you ensure that anything stuck on the edges of the blender is actually incorporated.
Final Verdict
Hopefully, the question Why is my blender not blending is come to light. If you are wondering why your blender doesn’t work, maybe you have found the answer.
You need to make sure that your blender is plugged in correctly, that you are using the correct settings, and that you are familiar with the blender’s anatomy so you will know what’s wrong and how to fix it. If the tips and troubleshooting techniques do not work, you may want to replace your blender or use its warranty to get it repaired.
Most commonly, blenders fail to work due to one of these reasons. In case you cannot resolve the issue or understand it, you should consult a professional.
Frequently Asked Questions
Why does my blender not blend frozen fruit?
Due to the fact that frozen fruits tend to have a sticky texture when compared to other ingredients, they might stick to the inside of the blender jar when it is being blended. Due to this, it may be necessary to add a small amount of water to ensure that blending is optimized and that ingredients are not stuck together during blending.
Why does my blender not crush ice?
If you are having this problem, there are several factors that may be contributing to the issue. Depending on the cause, there may be overfilled cups, stuck food between the blades, or the blades might need to be sharpened.

