When it comes to cleaning your Vitamix blender, a drop of soap in hot water is usually enough. But is this process enough for cleaning the Vitamix blending cup blade?
I will say no! Yes, blades are an essential part of your blender, which help to do the blending job finely. So, if you don’t clean it properly, it will wear out soon, stop spinning, or even get stuck.
Hence, if you are dealing with any blade problem, it may need to be cleaned. And today, I will guide you on how to clean Vitamix blender blades as well as other important things related to this topic.
First, let’s learn why it’s necessary to clean the blades from time to time.
The Reason You Need to Clean Your Vitamix After Each Use
Cleaning your Vitamix blender’s blade helps to extend the service life of your blender.
Also, as I said, after much time usage, food can get stuck in the edge or under the blade resulting in your Vitamix blender blade not spinning.
Moreover, the stuck food onto the blades can also cause food poisoning due to the growth of germs.
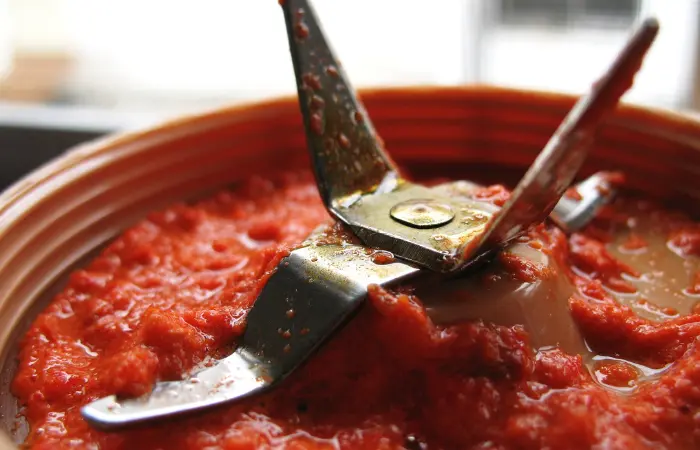
Therefore, regular cleaning prevents the buildup of residue between the blades and maximizes its durability.
Now that you know the necessity of cleaning the blades, let’s move on to learn the cleaning procedure.
How to Clean Vitamix Blender Blades Thoroughly?
Since there are different parts in the Vitamix blender, first you have to dissemble the container, the rubber gasket, and then the blade individually.
Next, follow the below steps to clean the individual parts and the blade.
Step 1: Remove the blade from the container as soon as you’re done using it.
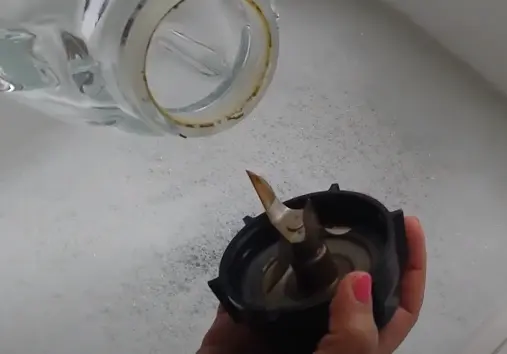
Step 2: Use warm water to rinse the blender’s container.
Step 3: Fill the container halfway with warm water and add a drop of dish soap.
Always remove the plug of the blender from the power outlet before cleaning or other stuff to avoid unwanted accidents.
Step 4: Now, take a soft bottle cleaning brush or a sponge and scrub the container wall to remove any food residue.
Step 5: Then, empty the container and thoroughly rinse.
Step 6: Next, hand-wash the cutting blade with warm soapy water to remove any food stuck in it. Make sure there is no food remaining on the edge of the blade. Then, rinse thoroughly.
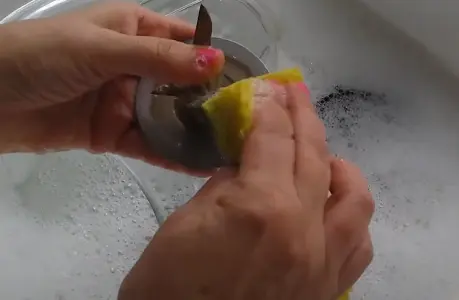
Step 7: Wash the gasket seal also with soapy water.
Step 8: Pat the blade, gasket seal, and container dry with a towel.
Here comes an important segment that you must read!
Should You Remove The Vitamix Container’s Blade to Clean It?
Since full-size Vitamix containers come in one piece, you don’t need to disassemble the part for cleaning.
In fact, Vitamix actually advises against disassembling the container since doing so violates the warranty. If components or parts of the blade assembly are altered by anyone other than Vitamix or a certified Vitamix service provider, the warranty becomes void.
So, I suggest dissembling the blade only if any of the below things happen.
1. The blade doesn’t spin or is hard to spin by hand.
2. It has a side-to-side or vertical movement.
3. The blade is making audible noise while rotating.
4. The outer surface of the blade has nicks, cracks, or gouges.
If neither of the above things happens, you don’t need to remove the blade for cleaning. Just let the blade in its place and wash the container with warm water and a few drops of a dishwasher.
However, when it shows any problem like the above, you have to remove it. And that’s why I will let you know how to remove blade from Vitamix blender now.
How to Remove The Blade from A Vitamix Blender
Follow the directions below to remove the blade from the container base.
Step 1
Detach the Vitamix blender container from the base. If you face any problem removing it, you may check out our guide on removing the base from the container.
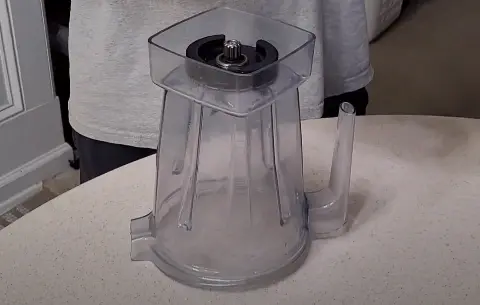
After that, remove the lid, turn the container upside down and place it on a flat work area.
Step 2
Find the large, round, silver retainer nut at the bottom of the container. Observe how the circular nut has a broad lip or lobe and two slots across from one another, each about an inch wide.
Step 3
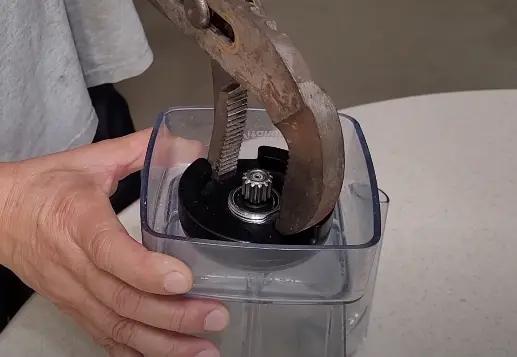
Set the Vitamix nut wrencher horizontally across one of the slots on the retainer nut. The wrencher’s tip should rest just past the driving spline, and the middle of the shaft should rest against the spline in the center of the retainer nut.
Step 4
Rotate the wrencher counterclockwise while holding the container with your other hand. The wrencher’s shaft rotates the retainer nut while it is horizontal, applying leverage from the driving spline.
Step 5
Keep turning the nut until it comes out from the blender’s container.
If your Vitamix blender’s bottom isn’t that much tight, then you can simply rotate the bottom part counterclockwise with your hand, and it will come out easily.
In case you don’t have the Vitamix nut wrencher, you can also use a large wrench to do the job.
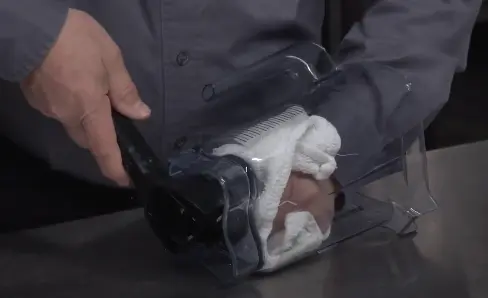
Now turn the container right side up and put a thick cloth over the blade that is inside the bottom of the container. Grab the blades with the towel and remove them from the container straight up.
That’s it. You now have successfully removed the blade.
Cleaning Under Vitamix Blades
Another common problem that often occurs in many Vitamix blenders is food sticking to the underside of the blades. And if it happens, a normal cleaning cycle won’t be able to fix it.
There are some foods that easily stick under, such as peanut butter, onions, flaxseed, stubborn smoothies, and creamy soup with thick ingredients.
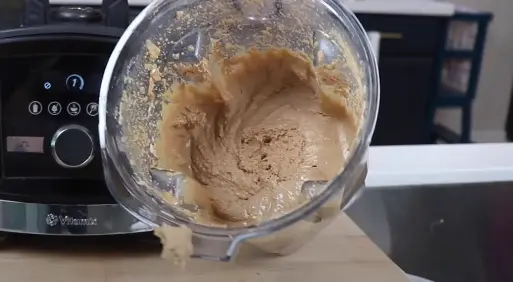
Unfortunately, you can do nothing to prevent this food from sticking. Furthermore, if you don’t take action right away, a small amount of food trapped in your blades could lead to far worse issues.
Leaving those leftovers under the blade can cause your container to get cloudy. Also, you will be blending with dirty blades without even knowing.
And whenever you blend any new food, the hummus stuck under the blades will mix in with the new food. Not a pleasant thing, right?
So, for all of these reasons, you need to clean underneath your Vitamix blades from time to time.
As I said before, the main thing that can get stuck is nut butter or other sticky or creamy things. So, now I will help you to learn how to clean those.
Guide to Remove Peanut Butter Or Other Sticky Things from The Blades
For most home cooks, cleaning nut butter from Vitamix blenders is the least enjoyable task. But, surprisingly, it’s so simple if you know the proper tricks.
Here are the steps that you need to follow.
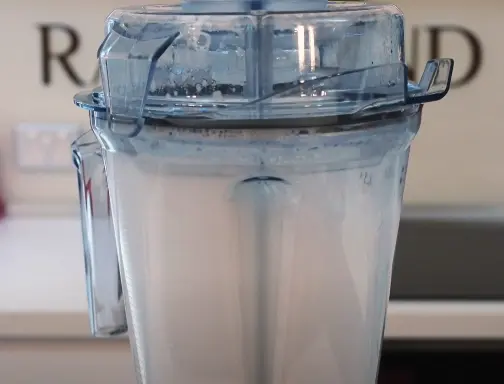
Step 1: Soak The container Overnight
First, make sure to remove as much peanut butter as possible by using a small silicone spatula. Then fill your container with warm water and let it soak overnight.
Step 2: Remove The Blade
The next day, drain the water from the container and remove the blade, following my previous instructions. Make sure to follow all the safety measures while disassembling.
Step 3: Scrub The Blade
Use a gentle pot scrubber to clean the blades. Since the blender was given time to soak, it will be easy to remove the peanut butter.
The rust can also be removed by soaking the blades in vinegar and then washing them with steel wool or an abrasive sponge.
Still, you need to thoroughly clean every nook and corner because nut butter can still cling to the blades. Otherwise, food debris could stimulate the growth of bacteria.
Step 4: Hand Wash The Container
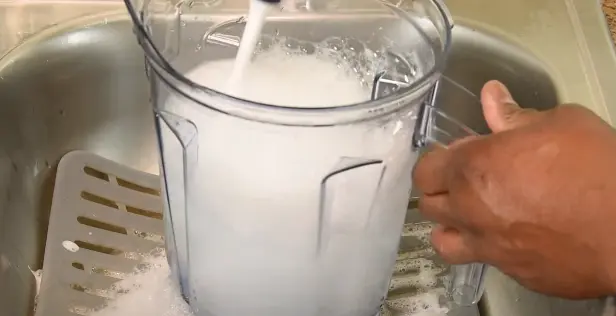
Once you have cleaned the blade, it’s time to wash the container, especially the bottom part where the blade was attached. Use the same soft brush or scrubber and wash the jar with warm soapy water.
Step 5: Let It Dry in Air
Finally, place the blender and its blades on a dish drying rack and let them air dry. Attach the blades to the blending cup firmly when you are ready to store them.
In case you want to clean the underneath of the blade without removing it from the container, then do as I said now.
How to Clean Under The Vitamix Blades Without Removing It
To remove any remaining slime, You first need to clean your blender’s blades by hand. You can always run a cleaning cycle.
However, I advise using a scrub brush on the bottom of your blades before doing so.
You should hand-clean the blades, then run a cleaning cycle, and scrub again until all the hummus comes out.
Now, if the leftover food doesn’t come off simply by scrubbing or your fingers can’t reach the slime, you may try using a special blade scraper.
You can purchase blade scrapers for Vitamix online. These will make cleaning the underside of your blades much simpler.
Alright, if you clean the blades by removing them, you should also learn how to assemble them again. So, here it is.
How to Reassemble The Blades After Cleaning
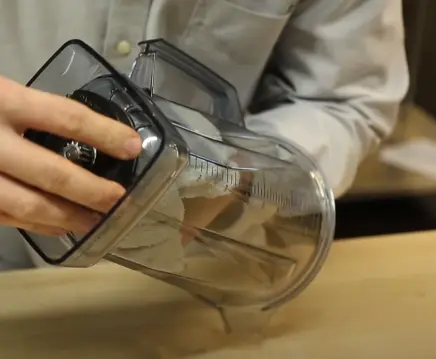
Hold the blade assembly with a rag or cloth to protect your hand. Place it back into the hole in the bottom of the container by aligning and pressing it firmly.
Place the retaining nut and screw it down with your finger. Once the nut is finger-tight, you can use the Vitamix nut wrench for tightening the rest of the way.
Now, sometimes the blade can be way too worn out to use again. In such a case, you should replace your Vitamix blender blade assembly.
How to Replace Blade on Vitamix Blender If It’s Worn Out
First of all, you have to buy a Vitamix blender replacement blade from an authorized retailer.
According to the type, the cost of a Vitamix blender blade varies. Besides the blade, I also suggest you purchase a Vitamix nut wrench if you don’t own one.
The device will be harmed if you attempt to replace the blade assembly or remove the retention nut using any other tools.
After you get your new blade, follow the below instructions.
Step 1: Take off the lid and turn the blender jar upside down. Place it on a flat surface and put a towel between the jar top and the surface to avoid damage to the lid of the container.
Step 2: Remove the drive socket using the wrench, press the existing blade assembly, and take it out by holding it with a cloth.
Step 3: Hold the new blade with a cloth, place it on the hole, and press it firmly. Replace the retaining nut and screw it down using your hand. Then, use the Vitamix nut wrench to screw tightly.
So, the next time your blades perform poorly, don’t run out and buy a new blender. Just follow these steps and replace the blades.
However, sometimes you don’t even need to replace it if it’s not much worn out and just needs to be sharpened.
How to Sharpen Vitamix Blender Blades?
The process of sharpening Vitamix blender blades is quite easy. It won’t cost you anything out of pocket because you can do it at home with stuff you may already have.
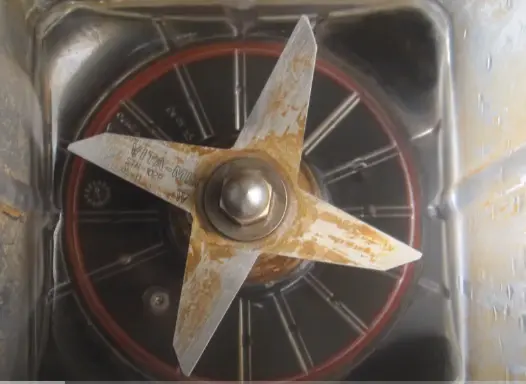
The best way to sharpen the blades is by using a wet stone. Now, do as I said from here.
Step 1: Unplug And Take The Blade Out
Before you start, make sure your Vitamix blender is unplugged. Additionally, you have to take the pitcher’s blade out so that nothing will get in the way when you use a damp stone to clean it.
Step 2: Wet The Stone And Blades
Place warm water onto your sharpening stone. It will help lubricate the blades while being sharpened.
Don’t use too much water, as it may cause the blade to slip against the stone.
On the other hand, water will also help in removing any food residue stuck on the blade. After that, dry the blades.
Step 3: Hold The Blade Gently And Run It Against The Stone
To safeguard your hands, put on a thick pair of rubber gloves. Run each blade over the sharpening stone with one hand firmly planted on it.
When sharpening the blade, keep it at a 15-degree angle.
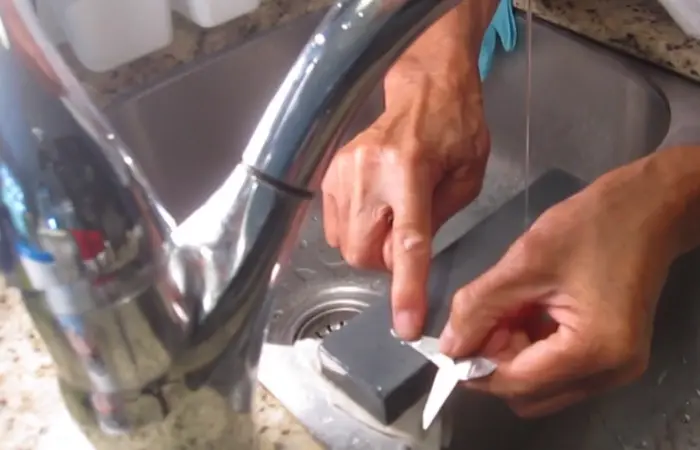
Since blades are so thin and don’t need much sharpening, this operation should just take around 15 seconds for each blade.
Remember that the blades can be harmed if you over-sharpen them.
Step 4: Remove Any Residue Using A Cloth Or Paper Towel
After sharpening your blades, make sure to wipe off any extra residue to prevent stone dust from accumulating. The simplest way to do this is to clean the surface of each blade one at a time using warm water and soap on a cloth or paper towel.
Step 5: Once All Surfaces Are Cleaned, Rinse with Warm Water
Once all of the blades have been thoroughly cleaned, give them a quick 15-second rinse under warm running water on each side to make sure they are glossy and spotless.
After that, you can dry them with a fresh piece of paper towel or cloth to avoid bacteria growing on the blades.
Step 6: Reinstall Your Blades in Their Housing, Then Tighten It Up.
Once all edges of the blade have been cleaned, put it back into its housing and screw it tight to the bottom.
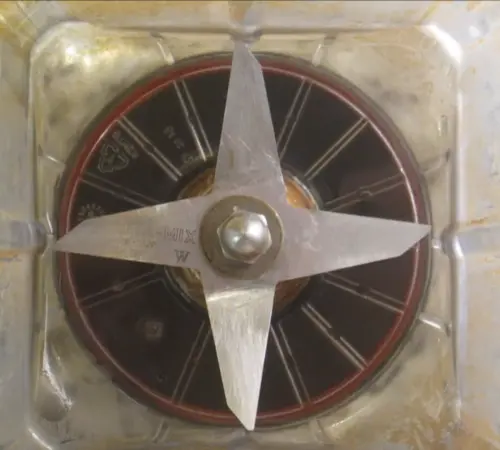
Make sure the blade is attached tightly, and there are no loose parts.
Step 7: Plug in The Blender to Test
Re-plug your Vitamix blender and turn it on to test out your freshly sharpened blade. This should be done after each time you sharpen the blades to ensure that they are functioning properly.
By the way, if you don’t have a stone for sharpening, there are other ways too. For example, you can use eggshells. You can check our detailed writing on how to sharpen a blender blade to learn more tricks.
Important Things You Must Know
Whether it’s about cleaning the blades or the other parts of the Vitamix blender, there are some facts that you should know.
And that’s what I am gonna talk about now.
Avoid Using Dishwasher
One of the most common questions users have is whether they should use the dishwasher to clean the Vitamix blender. And we should look at what Vitamix suggests in order to find the answer to the query.
According to Vitamix, the S-Series 20-ounce and 40-ounce blender containers are top-rack dishwasher safe. Besides, all the new Vitamix Ascent and Venturist containers are also dishwasher safe.
Except for these, all the other Vitamix blender items shouldn’t be put in the dishwasher.
Although I know some Vitamix users that have put the container in the dishwasher and never faced any problems, that doesn’t mean you should.
If you damage your blender by putting it into the dishwasher, it will likely void your warranty.
Therefore, it’s not recommended. First, your Vitamix container or other parts may be damaged or cracked by the dishwasher’s heat and dangerous dishwasher detergent, and they may eventually become worn out.
Also, after repeated dishwasher usage, the bearings on the container’s bottom will rust.
The duration of a dishwasher cycle is another factor. Personally, I use my Vitamix multiple times each day and would prefer not to have to wait 60 to 120 minutes before using it once more.
Instead, I will use the auto clean option, which takes only 60 to 120 seconds.
Auto Cleaning Function
You can always quickly clean your Vitamix blender with the auto clean function regularly. That way, there will be less chance of leftover foods in the blade.
Fill the container halfway with warm water and add a few drops of your mild dishwashing liquid. Secure the Vitamix container’s lid onto the container.
Then, activate the “clean” function on your blender and wait for it to shut off on its own after cleaning. Remove the container from the powerbase in a secure manner.
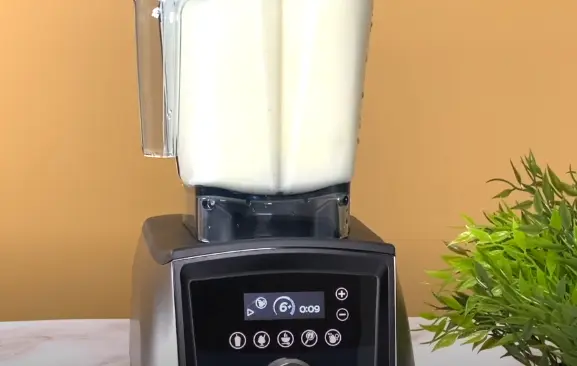
Empty the Vitamix container and scrub the entire jar with a soft sponge and warm, soapy water. Next, rinse the container and lid with clean water to remove the soap, then allow them to air dry.
So, what do you think? Isn’t it much easier?
Yes, you will be able to clean it within a minute, and it will be ready for use again.
Clean Regularly to Remove Smells & Odors
Sometimes the blender starts to stink. This nearly always occurs if you leave stains on your blades for an extended period of time, if you neglect to remove stuck butter from the bottom of your blades, or if you don’t thoroughly wash your Vitamix blender after each blend.
But if you will build a habit of cleaning your Vitamix blender on a regular basis, it won’t happen.
However, there are some smells that don’t go away with normal cleanings, like the odor of onion and garlic. In that case, fill the container with a mixture of warm water and white vinegar, and then use the auto clean function.
After that, follow the everyday cleaning method. Scrub with dish soap and clean with fresh water.
Basically, use vinegar the first time, then dish soap the second time, and rinse well.
Final Words
In this writing, I discussed how to clean Vitamix blender blades, the necessity of cleaning them, and many other important things you need to keep in mind.
Hopefully, you gained much knowledge regarding the topic that you can utilize now.
Frequently Asked Questions
How to clean a cloudy or stained Vitamix container?
Step 1: Fill up the container with 1 cup of white vinegar.
Step 2: Add warm water to the remaining space in the container.
Step 3: Leave the container for several hours or overnight to soak in these liquids.
Step 4: After that, empty the contents.
Step 5: Clean the container with a gentle pot scrubber.
Will Vitamix replace a scratched or cloudy container?
Sadly, no. The effects of using abrasives, cleaners, or food buildup, as well as discoloration and other cosmetic changes that do not affect performance, are not covered by the warranty.
Still, you can contact Vitamix customer service to know if there is any way to replace it. If not, you can purchase a new container straight from the Vitamix website.

