Regardless of the model, every oster blender consists of almost the same basic parts. When it comes to classic blenders, they have a removable lid, blender jar, a base that consists of the blades, and a motorized base.
Now whether you are struggling with assembling these parts or want to know how to use oster blender, you will get a complete guidelines here.
From classic Oster blenders, handheld to personal ones, I will let you know how to use those in this writing.
First, let’s know the basic features of these blenders.
Features of Oster Blender
I have already given you a little information on the different parts of Oster blenders. But, that was short and not detailed.
And before learning how to use these blenders, you need to have a broad idea about each part of them.
So, here are all the different parts that an oster blender features.
- On the top, you will find a feeder cap for adding ingredients inside while blending.
- Spill-resistant lid.
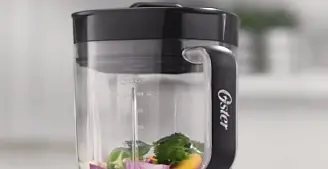
- Depending on the model, your oster blender may include one of the below glass jars.
- 6-cup (1.4 L) Dishwasher-safe glass jar
- 6-cup (1.4 L) Break-resistant plastic jar
- 5-cup (1.1 L) Dishwasher-safe glass jar
- BPA-free smoothie cup
- Under the glass jar, you will find a sealing ring for a tight seal.
- Crashing blades
- Threaded base for the jar
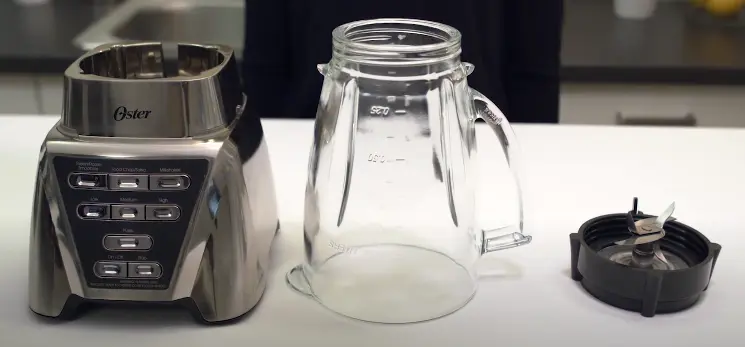
- Right under the jar, a powerful motor is situated.
- And lastly, the control panel and pulse are in the motor base.
How to Use Oster Blender Classic Series? Step By Step Direction
First of all, you have to assemble your blender. So, follow the below steps.
- After taking out all the blender parts from the box, clean everything.
- Take the jar and place it upside down so that the small opening is on the top.
- Place the sealing ring over the jar opening and then place the blade.
- Over the blade and the jar, place the threaded jar nut or jar skirt.
Note: If slots are on top of the collar, line them up with notches on the jar.
- Now, tighten the jar by turning it counterclockwise.
- Place the jar onto the base.
- Align the jar’s tabs with the tabs on the blender base. Make sure the jar’s tabs are positioned properly.
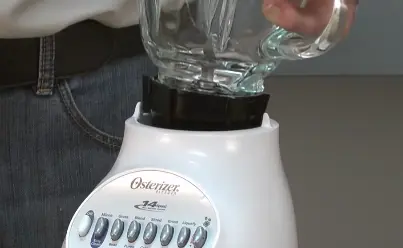
Now the blender is assembled and ready for use.
- Place all the ingredients inside the jar.
- Put the jar’s feeder cap on the lid.
- Plug the power cord into an electrical outlet.
- Push your desired speed button and blend the ingredients. You will find a slide switch to High or Low. In case your model doesn’t have a slide, then push the High or Low button according to your need.
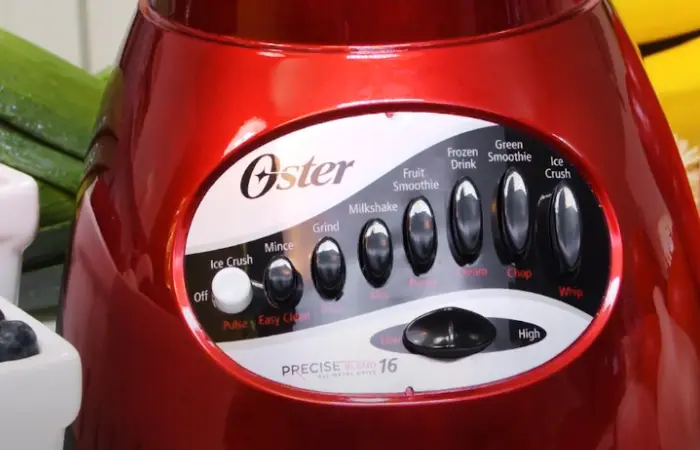
- When you are done, press the “OFF” button to stop the blender.
- For using PULSE, select the HIGH or LOW. Then, push PULSE and hold down for as long as you desire. Release it and allow the blade to stop. Repeat the cycle as necessary.
For your better understanding, I am providing a video below on how to use oster 10 speed blender.
By the way, till now, I talked about the classic series of Oster blenders. But, if you want to know about immersion, also known as hand blenders, my next section is for you.
How to Use Oster Hand Blender?
The Oster hand blenders have two parts. The upper part has the motor housing speed buttons, and the lower part has the beater blade/shaft housing.
Assembling these parts is easy. Just hold the motor housing in your right hand and attach it to the beater housing by rotating the motor. And it will lock firmly.
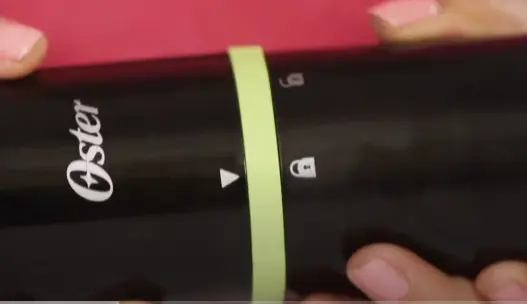
To unlock, hold the beater shaft/blade housing with your left hand and the motor housing on your right. And then, separate the units by turning the motor housing to the right.
Now that you know how to assemble and unlock, it’s time to learn how to operate an Oster hand blender.
- Put a dual-purpose lid on the mixing/measuring cup’s bottom for increased stability.
- Submerge the blade housing entirely into ingredients.
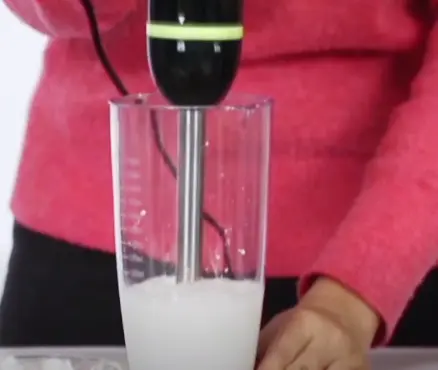
- Press the high or low button and start mixing the ingredients by moving the beater in circles. Maintain pressure on the button for at least 1 minute for continuous mixing.
- Always hold your hand blender firmly.
While mixing ingredients, it is totally normal for suction to form at the bottom of the container.
- After you reach the desired consistency, release the button and lift the hand mixer. Always release the button before removing the ingredients for a hand blender to avoid spills.
Important Note
Never leave this appliance running continuously for more than a minute at a time to increase its lifespan. Release the button after 1 minute of continuous use, then wait 3 minutes before using it again.
Also, never use a hand blender in a saucepan that is on a stove. Always remove the pan from the heat before mixing.
How to Use Oster Personal Blender?
Oster personal/ portable blender comes with a cup/ jar, blending lid, drinking lid, and USB charger. These blenders are easy to assemble and best to use while traveling.
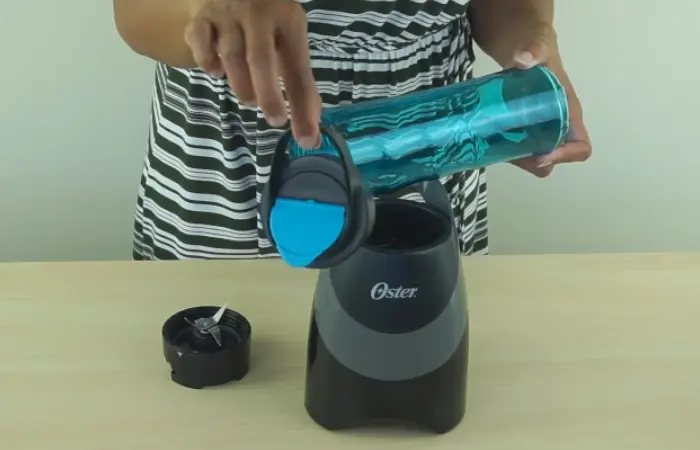
You just need to attach the blending lid to the cup, and it’s ready to use.
- First, fill the cup with your favorite ingredients. And don’t exceed the max fill line.
- Attach the blending lid to the cup by aligning the two dots situated on the blending lid and cup.
- To start blending, press the start button twice.
- Flip the cup upside down. Turn the cup both upside down and right side up as it combines. You will achieve a more even blend if you do this!
- Turn the Cup right way up and take off the Drinking Lid once the mixing is finished.
Note: The blender will operate for 30 seconds before shutting off on its own. If you want to stop the cycle early, click the start button once.
After your drink is ready, you can attach the drinking lid and enjoy your smoothie.
By the way, if you want to learn how to use Oster blender to make smoothies, you may quickly check the video attached below.
Now, you can easily make your smoothie in your personal blender and drink it on the go.
How to Use Oster Blender Food Processor?
If you have an Oster pro-1200 food processor combo or any other oster blender food processor, then you obviously need to know how to use those. Right?
So, here is your answer.
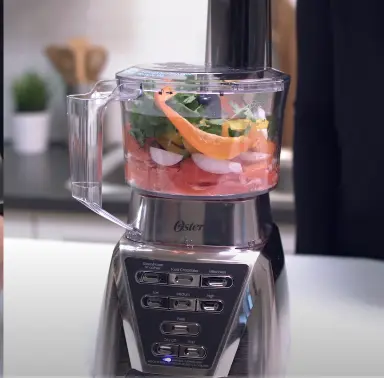
Depending on the model, the food processor has different parts, such as a food pusher, cover, slicing/ shredding disk, blade shaft, plastic center hub, 5-cup capacity bowl, and adaptor.
Now follow the below directions for assembling and using the food processor.
1. Check whether the adaptor is operating properly before assembling. Plug the Motor Base out while assembling to avoid any type of accident.
2. Place the adaptor in the bowl and turn counterclockwise to lock.
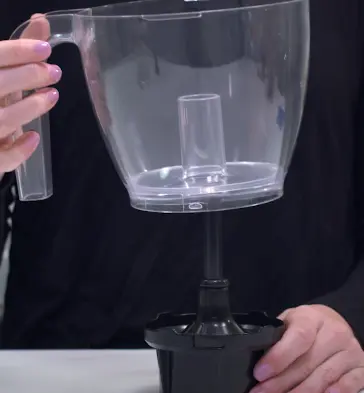
3. Then, place the bowl with the adaptor on top of the motor base.
To chop or mince:
4. Place S Blade over the bowl post while holding it by the plastic Center Hub. Since the blade is quite sharp, handle it with caution. Make sure the S Blade is placed as far up the post as it will go by rotating it. Before putting ingredients in the food processor, always insert the S blade.
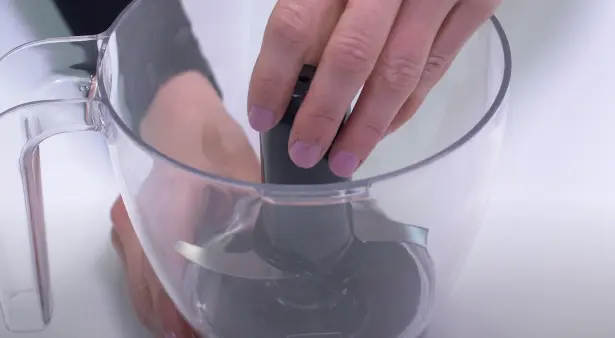
5. Add your food ingredients to the processing bowl. Always cut food into pieces measuring 1 inch (2.5 cm) or less before processing.
6. Place the lid on the bowl using the alignment marks, and then firmly press down while rotating it counterclockwise to lock.
7. Now, your food processor is assembled and ready to use. Note that you should not operate the unit until it’s completely assembled.
8. Turn the processor on and select pulse, low, or high setting on the motor base. (The control buttons may vary from model to model)
While starting the unit and during processing, always hold it firmly with one hand.
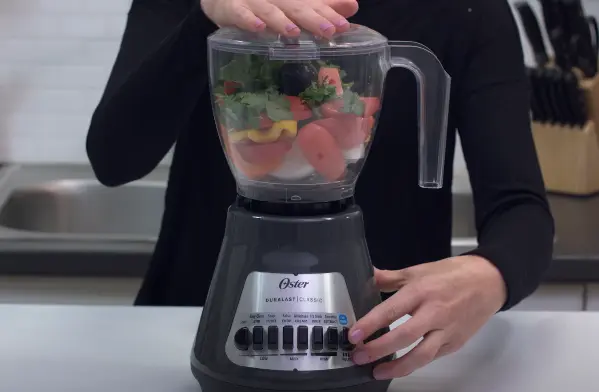
9. Running the device constantly or using fast pulsing should be done until the desired results are obtained. Fast pulsing is used to regulate the size of the food being processed with the Food Processor Accessory. Rapidly press and release the pulse button.
To slice or shred:
10. Attach the blade shaft to the post. Place the blade of your choice face up on the slicing/shredding disk over the Blade Shaft.
11. Place cover on the bowl using alignment marks on the lid. Then firmly press down while rotating it counterclockwise to lock.
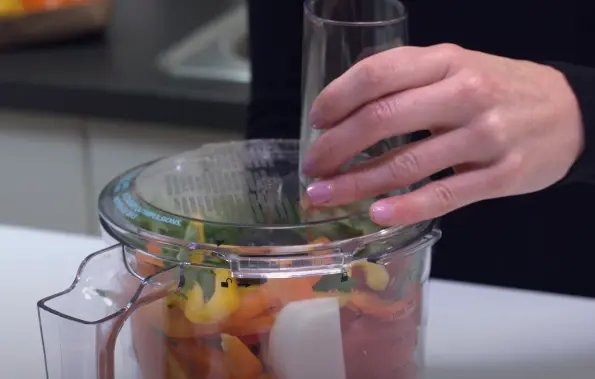
12. Load the feed tube with your ingredients before turning the processor on.
13. The feed tube is where the food pusher should rest. Put the unit “ON.” (Choose the medium speed option.) Push down gently on the food pusher while holding the feed tube in one hand and the food pusher in the other.
14. Turn the device off after you are done.
Note: Med – High manual settings are suggested for slicing and shredding.
By the way, if your blender doesn’t come with a food processor, and you need one badly, then I have a solution for you. You don’t even have to buy a food processor!
Yes, we have a complete guideline for using a blender as a food processor. Just check it if you need.
Anyway, till now, I have given you the necessary instructions for using an Oster blender. Now, I want to provide some blending tips that will help you in many ways.
Important Blending Tips You Should Know
Whether it’s an Oster or other blender, there are some basic things you should follow during blending. So, keep reading to learn all the tips I will share now.
- Always pour liquids inside the jar first, except a recipe tells otherwise.
- At a time, crush 6 ice cubes, or around 2 cups of ice.
- Don’t remove the lid while you are blending. If you want to add smaller ingredients, you may remove the filler cap.
- Make sure that all firm fruits and vegetables, cooked meats, fish, and seafood are cut into pieces that are no larger than 3/4 inch (1.8 cm) to 1 inch (2.5 cm). All cheeses should be divided into pieces no bigger than 3/4 inch (1.8 cm).
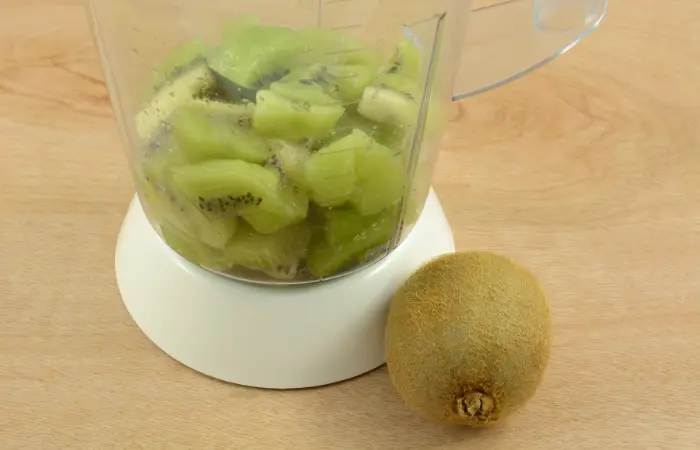
- Blender is not ideal for mashing potatoes, mixing stiff dough, or grinding raw meats.
- While using the blender, always place a hand on the cover of the container.
- While working with hot foods, open the filler cap to release steam. Also, keep your hands away from the cover opening to avoid possible burns.
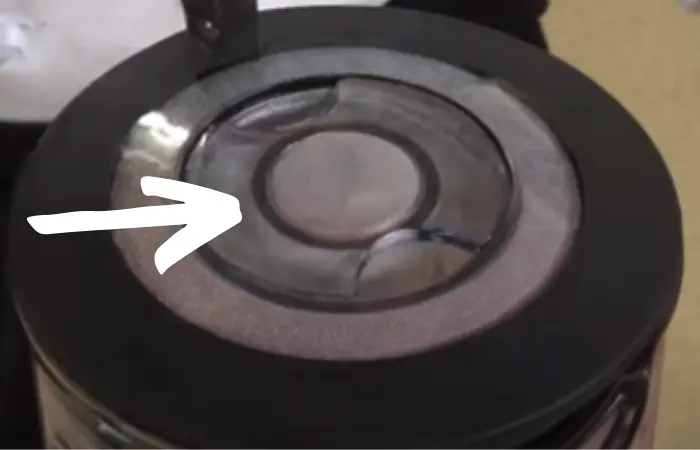
- Take off the Filler Cap and begin blending at a slow speed while working with hot liquids. Then slowly move to a faster speed. And never add liquid over the 1 liter (4 cups) level.
Instructions on Processing Foods in Blender
While processing food in a blender, we often get confused about how much quantity we should add and which pulse to use.
If you are also confused about it, look at the table below.
| Food Item | Unprocessed Quantity | Final Processed Quantity | Blending Instructions |
| Breadcrumbs | 1 slice, torn into 8 pieces | ½ cup | Pulse on low |
| Cheddar cheese | 1 cup of 1-inch (2.5 cm) pieces | 1 cup | Pulse on low |
| Swiss cheese | 1 cup of 1-inch (2.5 cm) pieces | 1 cup | Pulse on low |
| Hard or semi-hard cheese | 1 cup of 1-inch (2.5 cm) pieces | 1 cup | Chop continuously |
| Celery | 1 cup of 1-inch (2.5 cm) pieces | ¾ cup | Pulse on low |
| Coffee beans | 1 cup (250 ml) | 1 cup (250 ml) | Grind for approximately 45 seconds or until desired consistency |
| Boneless cooked meat | 1 cup of 1-inch pieces | 1 cup | Chop continuously |
| Nuts (almonds, peanuts, walnuts, etc.) | 1 cup | 1 cup | Pulse on high |
| Cookies, wafer | 10 wafers | ½ cup | Pulse on low |
| Graham crackers | 8 crackers | ½ cup | Pulse on low |
| Peppers | 1 cup | 2/3 cup | Pulse on high |
About Oster’s Versa Series Blenders
Oster’s Versa series blenders are specifically designed to compete with professional-grade models from rivals.
The best part of these is that they require minimal assembly. The skirt, sealing ring, and blade assembly are permanent components of the blender jar.
You just need to place the jar on the blender base, assemble the lid, and plug it in.
Three pre-programmed settings, a pulse, and a speed dial are all included on the control panel. Simply spin the speed dial clockwise to select from manual settings ranging from “Low” to “High.”
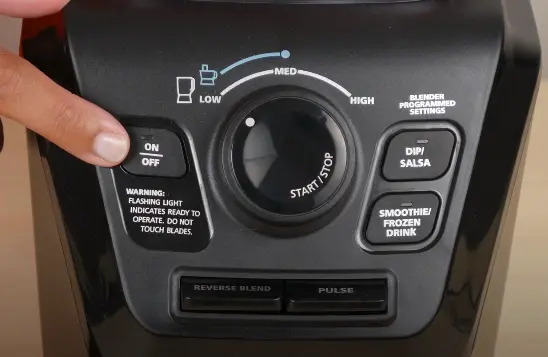
You must first activate the programmed settings by rotating the speed dial in the opposite direction to the “Programmed/Pulse” option. After that, decide the preset setting you want to utilize.
These settings have been time- and speed-optimized to blend most smoothies, soups, and dips/spreads to their optimum potential. As soon as the cycle is over, it will stop.
The red light surrounding the pulse button will blink to let you know the device is ready to use when the speed dial is set to the “Programmed/Pulse” option.
Alright, it’s high time to learn the safeguards instruction as I don’t want you to get hurt while using an oster blender.
Important Notes on Safety
While using electrical appliances, you should follow some basic safety precautions. Hence, read all the instructions before using your blender.
- Do not soak the cord, plug, or motor base in water or any other liquids to avoid the risk of electrical shock.
- Do not let the cord touch hot surfaces, such as the stove, or dangle over the edge of a table or a counter.
- When using an appliance, never leave it alone.
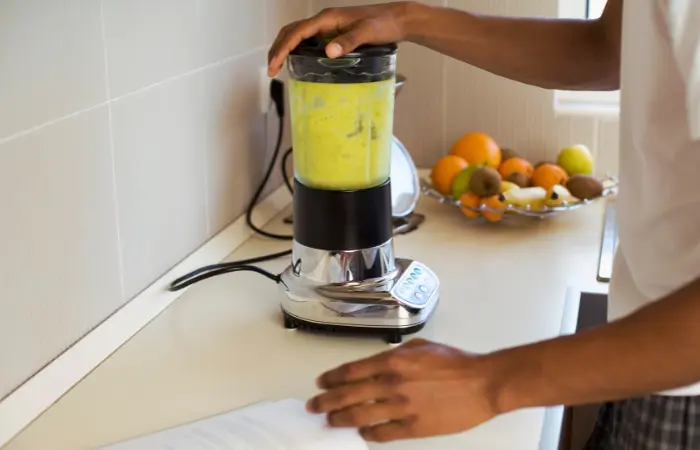
- When used by or around kids, close supervision is required.
- Keep your distance from moving parts. To avoid harm to yourself or damage to the blender, keep your hands and other objects out of the jar while you mix. You can only use a rubber spatula when the blender is not operating.
- Blenders have sharp blades. Therefore, handle it carefully.
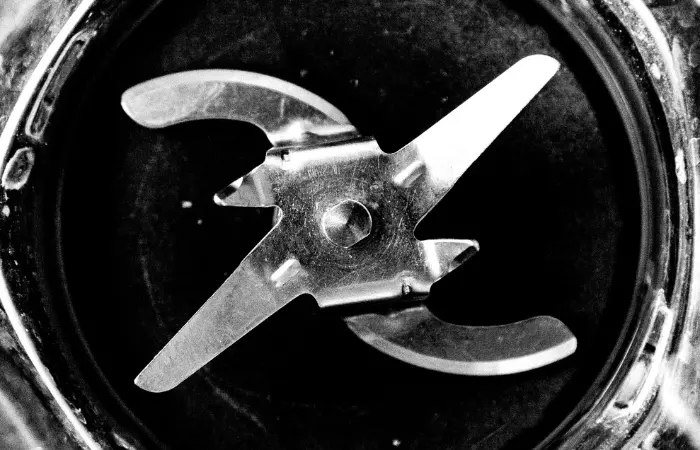
- To reduce the chance of injury, never place cutter-assembly blades on the base without attaching the jar properly.
- Before using the blender, always put the lid on the jar.
- Never blend boiling liquids in your blender.
- While blending hot liquids, be aware of the steam. You should remove the filler cap from the lid to let the steam out.
- Never use an appliance that has a broken cable or plug, or that has been malfunctioning, dropped, or otherwise damaged. Bring the appliance back to your local Appliance Service Center for inspection, maintenance, or mechanical or electrical adjustment.
- Always operate the blender on a flat surface.
- Unplug the blender while you are not using it, putting its parts together or taking off, and before cleaning.
- Use your appliance by following the described manual.
Instruction on Safe Use of Power Cord
To ensure the safe use of the power cord, you may follow the instructions below.
- Oster push-button blenders are equipped with a polarized plug. One blade of this particular plug is wider than the other. So, the plug will fit the outlet only one way. This safety measure aims to lessen the possibility of electrical shock. And if you are struggling to fit the plug, you may contact a licensed electrician to replace the outdated outlet.
Never attempt to beat the safety feature of these plugs by trying to modify them in any way.
- If an extension cord is required, feel free to do so. But you should follow these rules:
- The extension cord’s marked electrical rating must be at least as high as the device itself. On the appliance, the electrical ratings are clearly marked.
- The extension must be positioned such that it won’t hang over a counter or tabletop, won’t be within reach of kids, and won’t cause someone to trip.
- Never pull, twist, or mistreat the power cord in any other way.
How to Clean And Store Your Oster Blender?
After using your oster blender, it’s necessary to clean each part properly. It will increase the blender’s durability.
So, here is the cleaning method, which is superbly easy.
Easy Cleaning Method
Clean the blender’s base with a damp, soft sponge and a light detergent. Remember that all the other parts except for the blender base are dishwasher-safe.
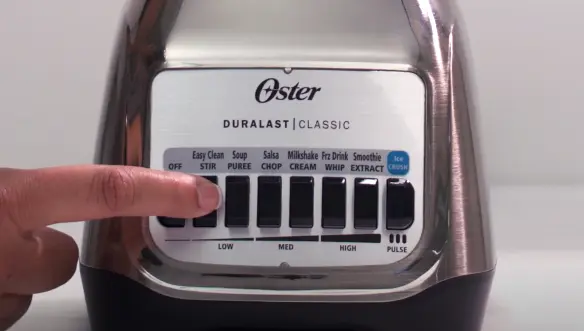
Add three cups of warm water inside the blender jar. Pour 1 to 2 drops of liquid dishwasher and blend on low speed or press the easy clean button (if your blender has it) for 10 to 15 seconds. Then, empty the jar of soapy water and rinse it with clean water.
For the sealing ring, you can wash it in soapy water. Then rinse well and dry.
After cleaning, reassemble blade to jar with sealing ring and jar bottom. Store blender with the cover ajar to prevent container odor.
Storing
Reassemble the blade to the jar with the jar bottom and sealing ring after cleaning. You may store the blender with the cover slightly ajar to stop container odor.
Well, finally, we are at the edge of our writing. So, let’s conclude it here.
Final Verdict
Hopefully, now you know how to use oster blenders from classic, handheld, personal, to versa series ones.
Now, go and assemble your blender and make yourself a glass of fresh smoothie or whatever you want.
Frequently Asked Questions
Can I use my oster blender to grind coffee beans?
Yes, you can grind coffee in your oster blender. Blenders are motor-driven and have spinning blades that can grind the coffee beans.
Although the blade can vary in shape depending on the blender’s model, it doesn’t matter much with coffee. Just put the beans inside and grind for around 45 seconds or until you get the desired consistency.
Is Oster blender good for making smoothies?
Oster blender is definitely good for making smoothies. Their high-quality blades can chop fruits and vegetables finely, resulting in a fresh and delicious smoothie.
Is Oster a good brand for blenders?
Oster has gained massive popularity among users because of its high-end performance and versatility. Therefore, it’s safe to say that oster is a good brand for blenders.
Still, it’s always good to go through user reviews before you purchase one.

